
Introduction to Sunshine Bliss Bars
What are Sunshine Bliss Bars and why are they perfect for you?
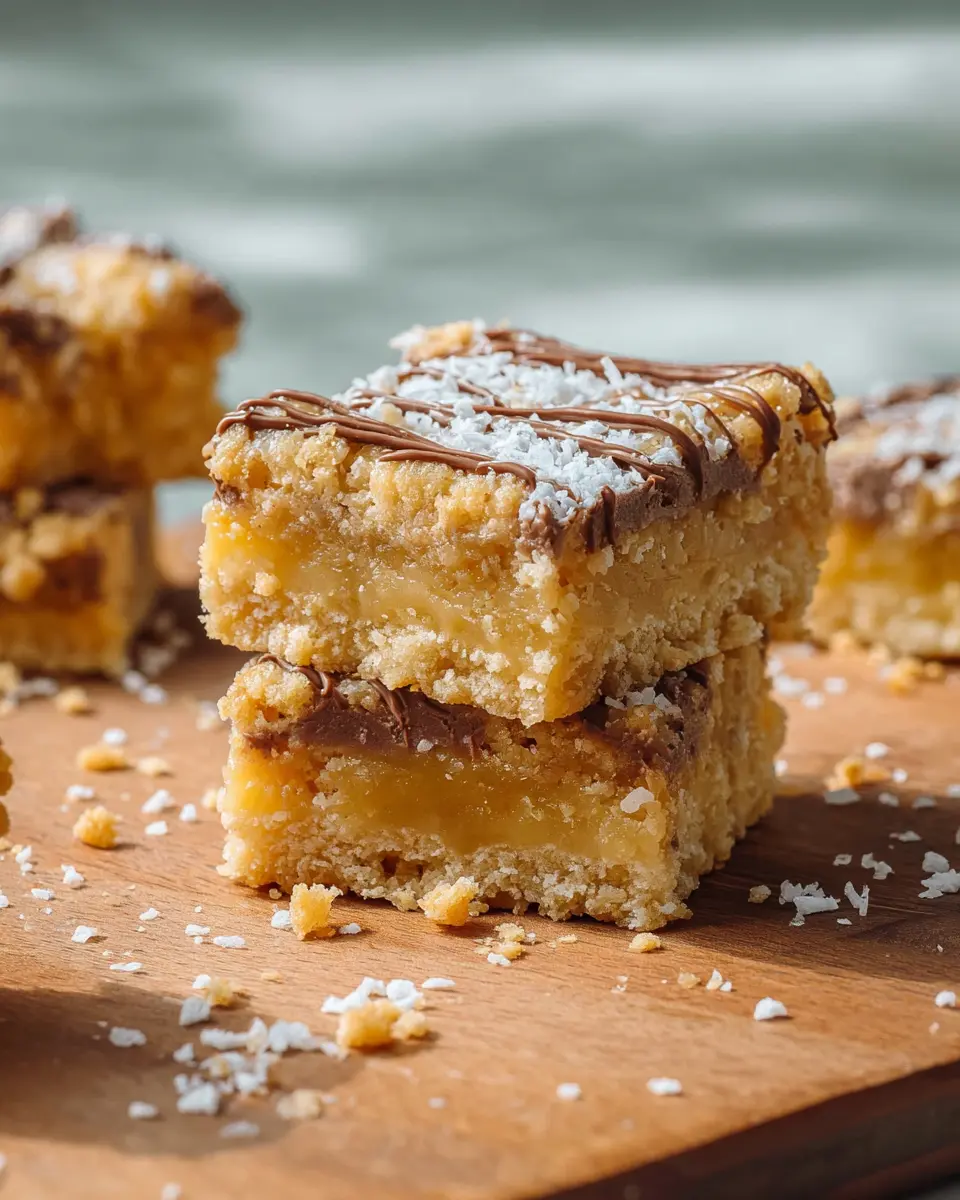
Looking for a delightful treat that fills your day with sunshine? Enter Sunshine Bliss Bars! These mouthwatering dessert bars feature a buttery crust topped with a luscious pineapple filling that brings a smile to anyone's face. The combination of sweetness and a tangy tropical flair makes them a crowd-pleaser at any gathering, whether it’s a brunch with friends or a picnic in the park.
What sets Sunshine Bliss Bars apart is their simple yet satisfying ingredients. Packed with nutritious crushed pineapple, these bars can brighten up your snack game while offering a burst of flavor that’s both refreshing and indulgent. Did you know that pineapple is rich in vitamins such as C and B6, and provides dietary fiber? Incorporating this fruit into your dessert can be a sweet way to sneak some nutrients into your diet!
These bars are not just easy to make but they also store well, making them a perfect option for meal prep. You can slice them, wrap them up, and enjoy a taste of sunshine during your busy week. So why wait? Check out our full recipe for Sunshine Bliss Bars and bring a slice of joy into your day!
Ingredients for Sunshine Bliss Bars
When you're ready to bake up some Sunshine Bliss Bars, gathering the right ingredients is key. Here’s what you’ll need to create both the crust and the delightful pineapple filling that makes these bars so irresistible.
For the crust and topping
- 1 ½ sticks (12 tablespoons) unsalted butter, melted and cooled slightly
- 1 teaspoon vanilla extract
- ¾ teaspoon kosher salt
- 2 cups all-purpose flour
- ½ cup granulated sugar
- ¾ teaspoon baking powder
The crust is buttery and slightly sweet, providing the perfect base and topping for a crunchy finish. If you’re looking for alternative crust ideas, consider using almond flour for a nutty twist!
For the pineapple filling
- 1 (20-ounce) can crushed pineapple in 100% juice
- ½ cup granulated sugar
- 3 tablespoons cornstarch
- ¼ teaspoon kosher salt
- Powdered sugar, for dusting
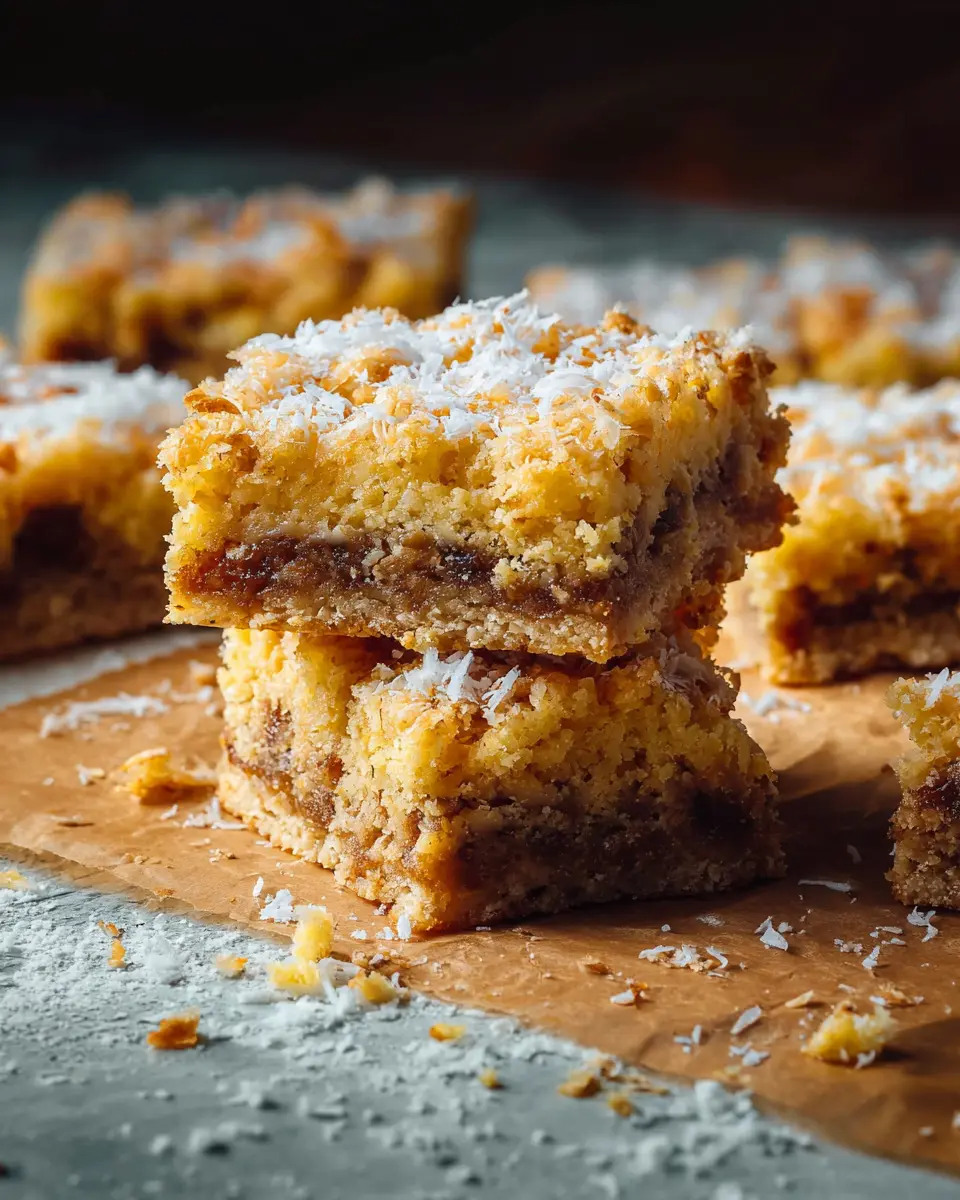
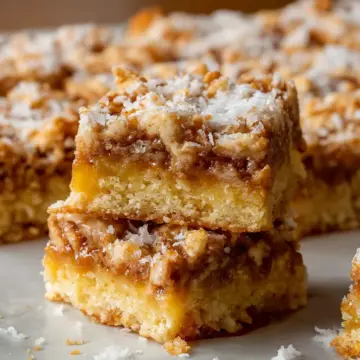
This pineapple filling is the star of the show, bringing a burst of tropical flavor that will brighten your day. Remember to drain the pineapple well to achieve the right consistency for your bars! For even more tropical vibes, you might want to sprinkle in some shredded coconut or lime zest.
Check out more about the versatility of pineapple from this source.
With these ingredients at hand, you’re all set to create something truly delightful!
Preparing Sunshine Bliss Bars
Making your own Sunshine Bliss Bars is not just a delightful baking experience; it’s a little journey of flavors that brightens up any day. Let’s dive into the preparation steps to ensure your bars turn out perfectly!
Preheat and Prepare Your Baking Pan
First things first—preheat your oven to 350°F (175°C). While that's heating up, grab your 8x8-inch square baking pan and line it with two sheets of parchment paper. This is a game-changer because positioning them perpendicular ensures that the parchment hangs over all sides. This “sling” makes it so much easier to lift your bars out later, giving them a beautiful presentation.
Mix the Crust Ingredients
Now that your pan is ready, it’s time to create the crust. In a large mixing bowl, combine 1 ½ sticks of melted unsalted butter, 1 teaspoon of vanilla extract, and ¾ teaspoon of kosher salt. Stir these together until well mixed. Next, add in 2 cups of all-purpose flour, ½ cup of granulated sugar, and ¾ teaspoon of baking powder. Mix until a soft dough forms, ensuring there are no dry spots left behind. This is the foundation of your Sunshine Bliss Bars—a smooth, buttery crust that’s hard to resist!
Bake the Crust to Perfection
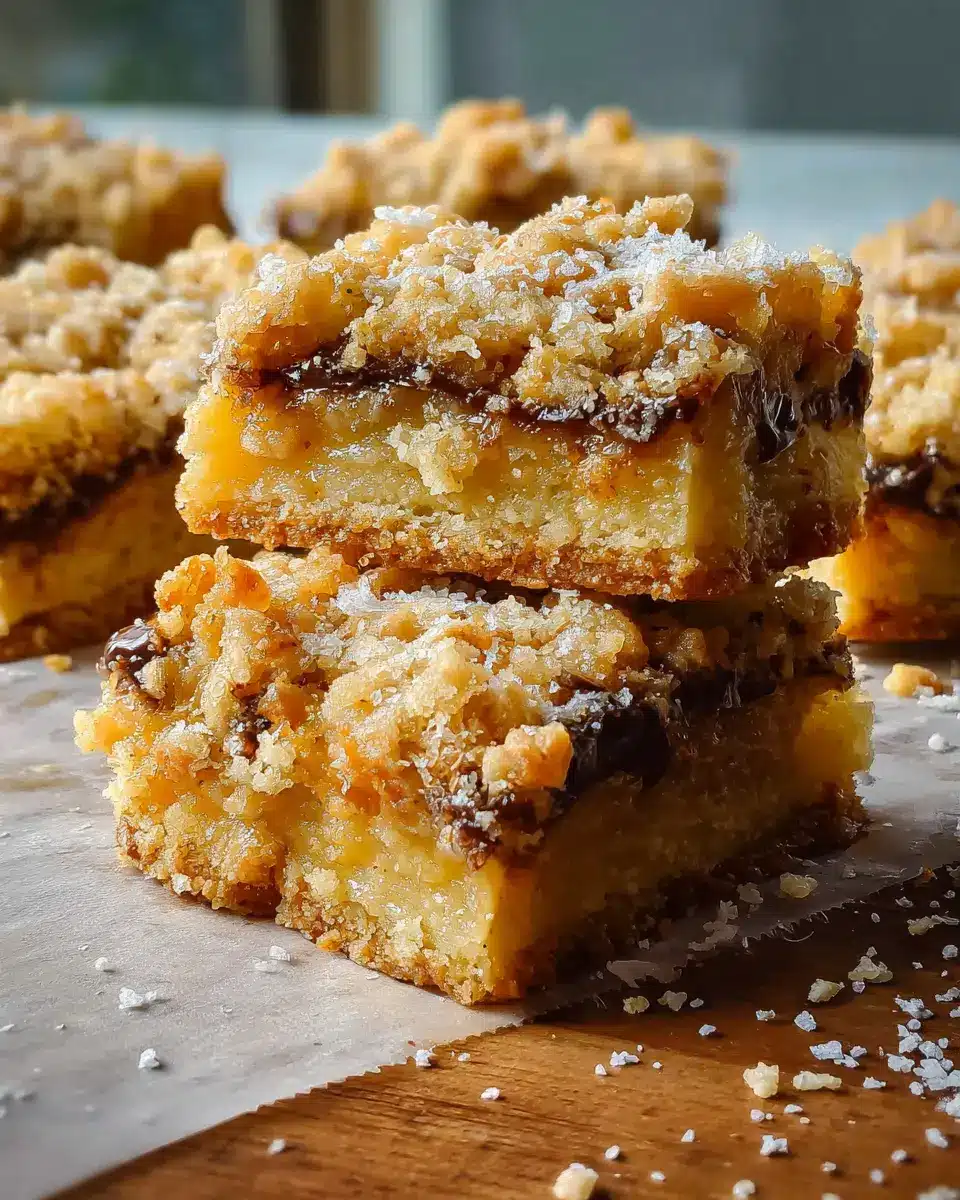
Once your dough is ready, reserve ¾ cup of it for later use. Press the remaining dough into your prepared baking pan, making sure it’s an even layer. Bake it for 17 to 20 minutes, or until it’s a light golden-brown and the top appears dry. As it cools slightly for about 8 to 10 minutes, you can start making the luscious pineapple filling (which will have everyone asking for seconds).
Prepare the Delicious Pineapple Filling
Increase your oven temperature to 375°F (190°C) as you prepare the filling. Drain the 20-ounce can of crushed pineapple, pressing it gently to remove excess liquid—don’t forget to reserve that juice for a refreshing drink! In the same bowl you used for the crust, mix the pineapple, ½ cup of granulated sugar, 3 tablespoons of cornstarch, and ¼ teaspoon of kosher salt until well-combined. This sweet and tangy filling is what makes these Sunshine Bliss Bars truly shine!
Assemble and Bake the Bars
Pour the pineapple mixture over the slightly cooled crust, spreading it evenly. Crumble the reserved dough on top to create a lovely texture. Bake these beauties for 30 to 35 minutes, or until the top is golden-brown and the filling is set. After that, place the pan on a wire rack and let it cool completely—about 2 hours will do the trick. Once cooled, dust with powdered sugar for that extra sunshine touch!
By following these steps, you’re all set to create delicious Sunshine Bliss Bars that are perfect for any gathering or cozy night in. For more tips on mastering your baking skills, check out King Arthur Baking for helpful resources and techniques. Happy baking!
Variations on Sunshine Bliss Bars
Tropical Twist Variations
To elevate your Sunshine Bliss Bars, why not add a tropical twist? Consider incorporating shredded coconut or chopped macadamia nuts into the crust for that beachy vibe. For a burst of citrus flavor, integrate the zest of a lime or orange in the filling. You can also swap the canned pineapple for fresh mango or passionfruit for different fruity layers. These simple modifications not only enhance flavor but also give your bars a vibrant presentation!
Healthier Swaps for Ingredients
If you’re looking for a healthier version of Sunshine Bliss Bars, consider these swaps:
- Whole wheat flour can replace all-purpose flour for an added fiber boost.
- Substitute coconut oil for butter to lessen saturated fat.
- Use a natural sweetener like maple syrup or honey instead of granulated sugar for a lighter touch.
- Try adding Greek yogurt to the filling for creaminess while boosting protein content.
These adjustments make your bars not just delicious but also a bit kinder to your waistline! For more healthy baking tips, check out Healthline.
With these variations, your Sunshine Bliss Bars can cater to any palate, making them perfect for gatherings or a nutritious afternoon treat!
Cooking Tips and Notes for Sunshine Bliss Bars
Making Ahead and Storing Tips
Sunshine Bliss Bars are a fantastic treat for any occasion, and the best part? You can make them ahead of time! After baking and cooling, store these delicious bars in an airtight container at room temperature for up to three days. If you want to enjoy them later, consider freezing them. Wrap the cooled bars tightly in plastic wrap and aluminum foil before popping them in the freezer, where they'll keep for up to three months. For a quick treat, just thaw and enjoy!
For a fresh taste, dust them with powdered sugar right before serving. Need more ideas for storing treats? Check out this helpful guide on meal prep storage!
Serving suggestions for Sunshine Bliss Bars
Pairing ideas for a delightful experience
When enjoying your Sunshine Bliss Bars, consider these delightful pairings to elevate your experience. They're perfect as a light dessert or a refreshing snack, and a simple cup of tea or freshly brewed coffee makes for a wonderful accompaniment. The brightness of a citrus-infused tea brings out the tropical flavors of the pineapple filling.
For a heartier option, serve them alongside a scoop of vanilla ice cream—it melts beautifully over the warm bars! If you're in a fruity mood, pair them with fresh berries like strawberries or blueberries to add a burst of flavor.
With these pairing ideas, your Sunshine Bliss Bars will brighten up any occasion. Enjoy exploring these combinations! For more on perfect pairings, check out this resource.
Time Breakdown for Sunshine Bliss Bars
Preparation time
Getting started on these Sunshine Bliss Bars is a breeze! You’ll need about 15 minutes to prepare the crust and the pineapple filling, leaving you ample time to gather your ingredients and get everything set up.
Baking time
Once your bars are prepped, they’ll spend around 50 minutes in the oven. First, you’ll bake the crust for about 20 minutes, then the assembled bars for another 30 to 35 minutes. In total, that’s just shy of an hour of baking magic happening!
Total time
All the prep and baking will take approximately 1 hour and 5 minutes. However, keep in mind that you’ll want to let those delicious bars cool completely for about 2 hours before slicing them up. So, in total, you’re looking at roughly 3 hours and 5 minutes from start to enjoying your delicious Sunshine Bliss Bars. Perfect for a weekend treat or an afternoon snack!
Nutritional Facts for Sunshine Bliss Bars
When you indulge in Sunshine Bliss Bars, it's natural to wonder about their nutritional perks. Here’s a quick rundown:
-
Calories: Each bar contains approximately 180 calories, making it a satisfying treat without the guilt.
-
Protein: These yummy bars deliver around 2 grams of protein, perfect as an energy boost during your busy day.
-
Sugar Content: With about 12 grams of sugar per serving, they offer a delightful sweetness that balances beautifully with the tangy pineapple filling.
For more detailed nutritional information, you might want to check resources such as the USDA Food Data Central or consult a nutritionist for personalized advice. Enjoy your baking and the sunshine-filled joy that comes with these delicious bars!
FAQs about Sunshine Bliss Bars
How long can I store Sunshine Bliss Bars?
You can keep your Sunshine Bliss Bars fresh in an airtight container at room temperature for up to three days. If you want to extend their life, simply wrap them tightly in plastic wrap and aluminum foil, and pop them in the freezer. They’ll maintain their delightful flavor for up to three months. Just remember to let them cool completely before wrapping!
Can I substitute fresh pineapple for the canned version?
Absolutely! While the original recipe uses canned crushed pineapple for convenience, you can substitute fresh pineapple if you prefer. Just make sure to chop it finely and blend it well to achieve a similar texture. Fresh pineapple can add an extra burst of flavor to your Sunshine Bliss Bars.
What’s the best way to serve these bars?
Sunshine Bliss Bars are perfect for any occasion! For an elegant touch, dust them with powdered sugar just before serving. You can fully enjoy them on their own or serve with a scoop of vanilla ice cream for that extra indulgence. For a fun twist, consider pairing them with a refreshing fruit salad. Your friends and family will be raving about them!
Conclusion on Sunshine Bliss Bars
In conclusion, Sunshine Bliss Bars are a delightful treat perfect for any occasion. Their perfectly balanced crust and luscious pineapple filling promise to brighten your day. Whether you're enjoying them at a summer picnic or a cozy evening at home, these bars are sure to impress. Happy baking!
Sunshine Bliss Bars
Equipment
- 8x8-inch square baking pan
- parchment paper
- strainer
- Mixing Bowl
Ingredients
For the crust and topping
- 12 tablespoons unsalted butter melted and cooled slightly
- 1 teaspoon vanilla extract
- ¾ teaspoon kosher salt
- 2 cups all-purpose flour
- ½ cup granulated sugar
- ¾ teaspoon baking powder
For the pineapple filling
- 1 can crushed pineapple in 100% juice (20-ounce)
- ½ cup granulated sugar
- 3 tablespoons cornstarch
- ¼ teaspoon kosher salt
- Powdered sugar for dusting
Instructions
Make the crust
- Heat the oven to 350°F. Line an 8x8-inch square baking pan with 2 sheets of parchment paper, positioning them perpendicular to each other so that the parchment hangs over all 4 sides of the pan to form a sling.
- Stir 1 ½ sticks melted unsalted butter, 1 teaspoon vanilla extract, and ¾ teaspoon kosher salt together in a large bowl until well-combined. Stir in 2 cups all-purpose flour, ½ cup granulated sugar, and ¾ teaspoon baking powder until a soft dough forms and no dry streaks remain.
- Reserve ¾ cup of the dough. Transfer the remaining dough to the baking pan, and press it into an even layer with your hands or a flat-bottomed measuring cup (reserve the bowl).
- Bake until light golden-brown and the top appears dry, 17 to 20 minutes. Let cool slightly, 8 to 10 minutes. Meanwhile, make the pineapple filling.
Make the pineapple filling and assemble
- Increase the oven temperature to 375°F. Drain 1 (20-ounce) can crushed pineapple and gently press against the strainer to remove as much liquid as possible (reserve the juice for another use).
- Stir the pineapple, ½ cup granulated sugar, 3 tablespoons cornstarch, and ¼ teaspoon kosher salt together in the now-empty bowl (no need to clean) until combined.
- Pour over the slightly cooled crust and spread into an even layer. Crumble the reserved dough evenly over the filling.
- Bake until the top is golden-brown and the filling is set, 30 to 35 minutes. Place the pan on a wire rack and let cool completely, about 2 hours.
- To serve, grasp the excess parchment and remove the slab from the pan to a cutting board. Dust with powdered sugar and cut into 16 pieces.

Leave a Reply