
Introduction to No Knead Seeded Oat Bread
If you’re new to baking or simply searching for a fuss-free way to enjoy homemade bread, no knead seeded oat bread is your answer. This delightful recipe is perfect for young professionals juggling busy schedules, as it requires minimal hands-on preparation and no kneading—perfect for those who want fresh bread without a lengthy time commitment.
Imagine waking up to the warm, nutty aroma of freshly baked bread wafting through your kitchen. With this recipe, you can easily incorporate wholesome ingredients like oats, pumpkin seeds, and sunflower seeds into your diet. Plus, the flexibility of letting the dough rise in your refrigerator means you can prepare it ahead of time, making it a straightforward option for meal planning during hectic work weeks.
This bread’s unique combination of flavors not only provides a delightful crunch but also promotes a satisfying morning toast or an excellent side for soups and salads. In short, you don’t need to be a seasoned baker to enjoy the perks of homemade bread—just your passion for good food and a bit of patience.
Ready to dive into this rewarding baking experience? Let’s get started!
Essential Ingredients for the Recipe
Creating no knead seeded oat bread is a breeze with the right ingredients. You'll need a handful of essentials that come together beautifully to yield a deliciously hearty loaf. Here's what you’ll need:
- Bread Flour: 3 cups (390g) is essential for that chewy texture; feel free to use more for shaping.
- Instant Yeast: 2 teaspoons (about 6g) of Platinum Yeast from Red Star is recommended for a reliable rise.
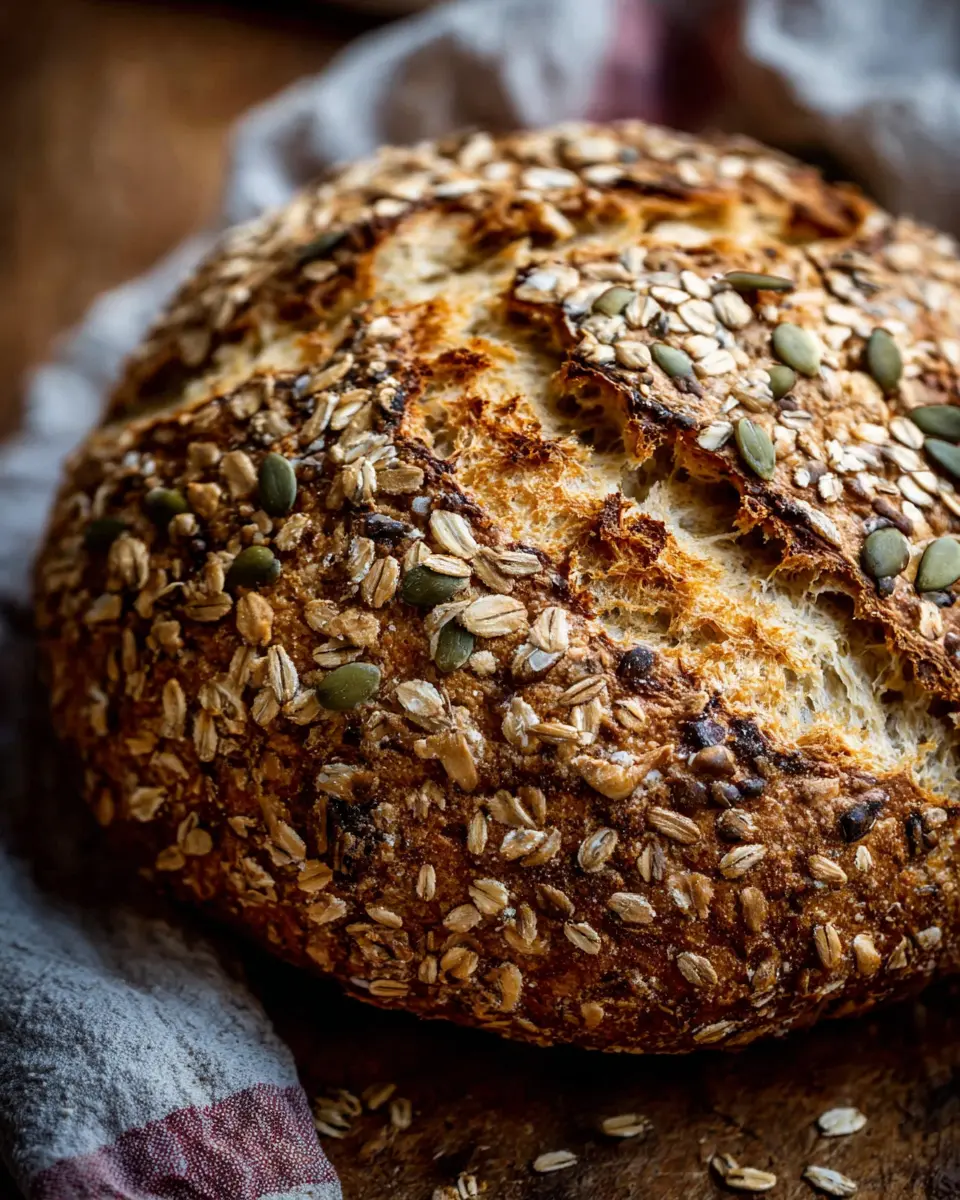
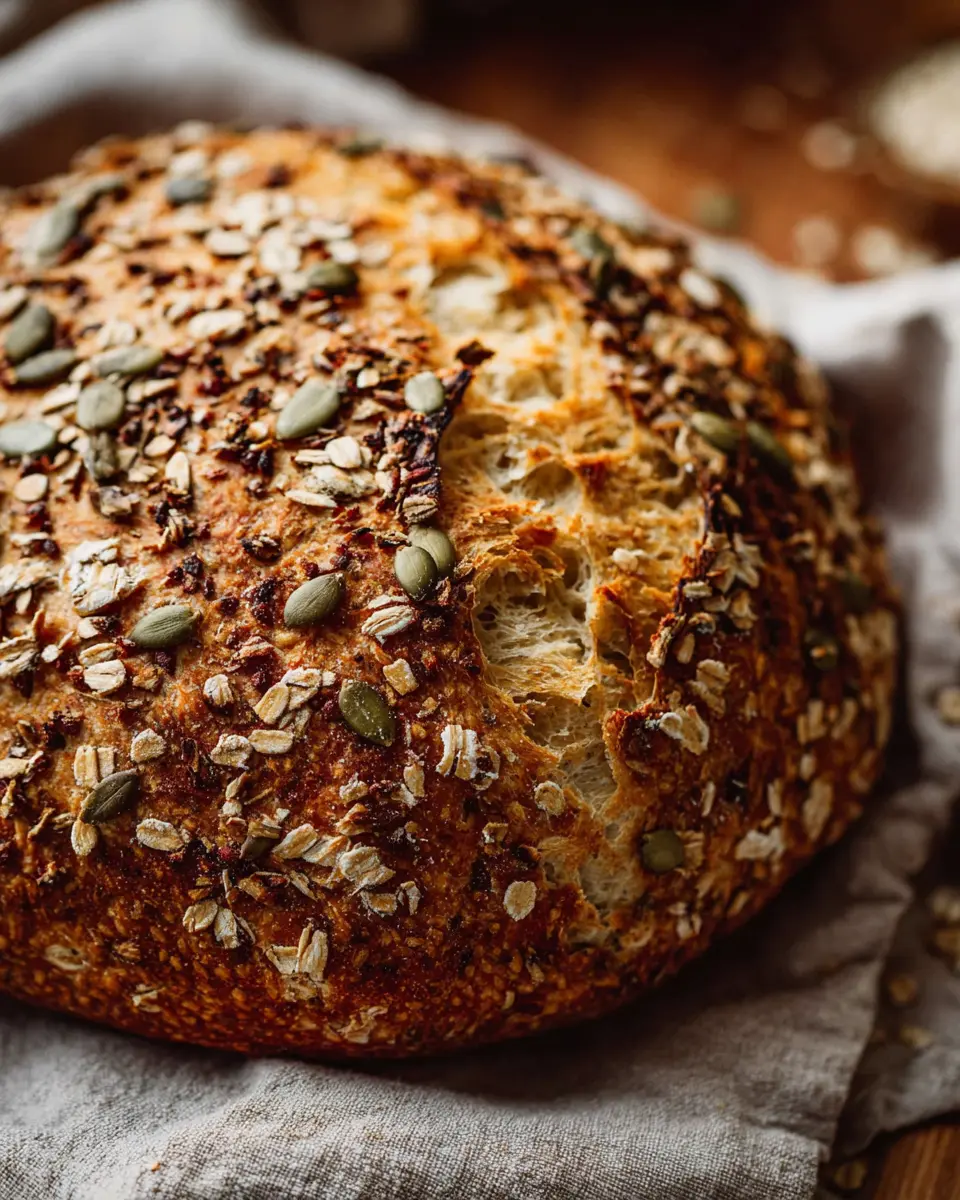
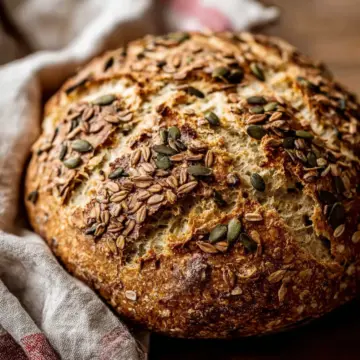
- Whole Rolled Oats: 1 cup (85g) adds a lovely nuttiness and nutritious kick.
- Pumpkin Seeds: ¼ cup (30g) for crunch and flavor.
- Sunflower Seeds: Another ¼ cup (30g), because who doesn’t love a sprinkle of seeds?
- Flax or Sesame Seeds: Just 2 tablespoons (18g) to amp up the health benefits.
- Coarse Salt: 2 teaspoons to enhance the flavors.
- Honey: 2 tablespoons (43g) provides a touch of sweetness, complementing the nuttiness.
- Warm Water: 1 and ½ cups (360ml) around 95°F (35°C) to activate your yeast.
Optional ingredients like cornmeal for dusting can elevate your bread’s crispiness. You might be surprised at how easily these simple elements combine into something wonderful! Ready to get baking?
Preparing No Knead Seeded Oat Bread
Baking your own bread can feel like a daunting task, but this no knead seeded oat bread recipe turns the process into a delightful and simple experience. In just a few steps, you can enjoy freshly baked, nutritious bread that’s perfect for any meal. Let’s dive into the preparation and see how simple yet satisfying this bread can be!
Gather All Your Ingredients
To start, ensure you have all the ingredients on hand. You’ll need:
- 3 cups (390g) bread flour
- 2 teaspoons instant yeast (like Platinum Yeast from Red Star)
- 1 cup (85g) old-fashioned whole rolled oats
- ¼ cup (30g) unsalted pumpkin seeds
- ¼ cup (30g) salted or unsalted sunflower seeds
- 2 tablespoons flax seeds or sesame seeds
- 2 teaspoons coarse salt
- 2 tablespoons honey
- 1 and ½ cups (360ml) warm water (around 95°F/35°C)
- Optional: cornmeal for dusting your baking sheet
With everything ready, your baking adventure is set to commence!
Mix the Dry Ingredients
In a large mixing bowl, whisk together the bread flour and instant yeast. Next, add the rolled oats, pumpkin seeds, sunflower seeds, flax seeds, and salt, making sure to combine everything thoroughly. Whisking helps ensure that yeast and other dry components are evenly distributed, which is essential for a good rise.
Combine Wet Ingredients with Dry
In a separate container, mix the honey and warm water. Once they’re well combined, pour this mixture over your dry ingredients. Use a silicone spatula or a wooden spoon to mix; the dough will be sticky and shaggy, which is completely normal. Don't stress over its appearance; it will come together beautifully!
Allow the Dough to Rise
Cover your mixing bowl tightly with plastic wrap or aluminum foil, and let the dough rise at room temperature for about three hours. You’ll notice it expand and bubble—a sign that your yeast is doing its job! For an even better flavor, allow it to rest in the refrigerator for at least 12 hours, or up to three days.
Shape the Dough After Resting
Once the dough has risen, lightly dust your work surface (or simply keep it in the bowl) with flour. Using generously floured hands, gently coax the dough into a ball, being careful not to deflate it too much. Remember, the dough will be sticky, so flour is your friend here!
Prepare for Baking
Dust a large nonstick baking sheet with flour and/or cornmeal. Place the shaped dough on the parchment, and sprinkle your reserved topping ingredients over the top. If they don't stick, give them a gentle press. Now, loosely cover the dough and let it rest for 45 minutes while your oven preheats to 425°F (218°C).
Score and Bake the Bread
When ready to bake, use a sharp knife or a bread lame to score a shallow slash or X into the top of your dough (about half an inch deep). This allows the bread to expand while baking. Transfer the dough to the oven, and for a crispier crust, you can add water to a tray on the bottom rack to create steam. Bake for around 40 minutes until golden brown and hollow-sounding when tapped.
Let your no knead seeded oat bread cool before slicing, and enjoy the delightful aroma and flavor that fills your kitchen!

Variations on No Knead Seeded Oat Bread
Adding Different Seeds
One of the joys of making no knead seeded oat bread is experimenting with different seeds based on your taste or what's in your pantry. Consider swapping out pumpkin seeds for chia or poppy seeds for an interesting texture. You can even mix it up with hemp seeds or caraway seeds for a unique flavor twist. Just remember, you’re aiming for about ½ cup of larger seeds combined and 2 tablespoons of smaller seeds for balance. Don't shy away from what you love; after all, this bread is all about personalization!
Using Different Flours
You can also get creative with the flour you use! While bread flour gives that chewy, robust texture, try incorporating white whole wheat flour or spelt flour for a nuttier flavor. If you want something gluten-free, a blend of almond and coconut flour could be your answer—just keep in mind you might need to adjust the water ratio. Be sure to check out some great resources, like King Arthur Baking, for tips on flour substitutions to ensure your bread remains delicious!
Cooking Tips and Notes for No Knead Seeded Oat Bread
Importance of Proper Rising Time
Achieving the perfect texture in your no knead seeded oat bread hinges on paying close attention to rising times. The initial 3-hour rise at room temperature allows the dough to develop flavor and structure. For optimal results, consider refrigerating the dough for 12 to 72 hours. This slow fermentation enriches the taste and enhances the bread's chewiness. Just bear in mind that even slight deflation during this time is perfectly normal—just gently shape it before baking!
Best Practices for Dough Handling
Handling sticky dough can be a challenge, but it's key for success. Always flour your hands generously to prevent sticking when shaping the dough. When transferring it to the baking sheet, do this with a gentle touch to maintain that wonderful airiness. If you have a trusty silicone spatula on hand, it's a great tool for scraping down the bowl without losing any precious dough. Happy baking, and don’t forget to explore tips for other artisan breads as well!
Serving Suggestions for No Knead Seeded Oat Bread
Perfect pairings with spreads
Your no knead seeded oat bread is a versatile canvas for all kinds of delicious spreads. Consider pairing it with:
- Cream cheese mixed with fresh herbs for a savory twist.
- Avocado topped with a sprinkle of salt and chili flakes for a healthy snack.
- Hummus or tahini for a protein-packed experience.
- Nut butter and honey for a sweet morning treat.
Experiment with these to discover your favorite combo!
Creative uses for leftover bread
Don’t let any leftover seeded oat bread go to waste! Here are some tasty ideas:
- Bread crumbs: Simply pulse in a food processor and use for topping casseroles or coating proteins.
- Bread pudding: Transform it into a warm, comforting dessert with eggs, milk, and spices.
- Croutons: Cube, season, and bake until crispy for salads or soups.
With a bit of creativity, your leftover bread can become a whole new dish!
Time Breakdown for No Knead Seeded Oat Bread
When it comes to baking your own no knead seeded oat bread, understanding the timing is crucial for success. Here’s a quick overview to keep you on track:
Preparation Time
Set aside just 20 minutes to mix the ingredients and shape the dough. That’s all it takes to get started on this delicious bread!
Rising Time
Plan for 3 hours at room temperature for the dough to rise, or, for even better flavor, refrigerate it for 12 to 72 hours. Yes, you can let it develop while you’re busy!
Baking Time
You’ll need approximately 40 minutes for baking to achieve that perfect golden crust.
Total Time
In total, including prep and rising, you’re looking at about 3 hours of hands-on time, but don’t forget that refrigerator rising significantly improves flavor.
Enjoy the process and savor your homemade bread’s enticing aroma! For more tips, check out How to Measure Baking Ingredients to ensure accuracy in your baking.
Nutritional Facts for No Knead Seeded Oat Bread
When you're enjoying a slice of no knead seeded oat bread, it’s great to know just how it’s benefiting your body! Here’s a quick snapshot of its nutritional profile:
Calories
Each slice of this bread offers approximately 150 calories, making it a wholesome addition to your meals without being overly indulgent.
Protein
Packed with healthy ingredients, you’ll find about 5 grams of protein per slice. This helps keep you feeling full and supports muscle maintenance.
Fiber
With around 3 grams of fiber per serving, this bread is a fantastic way to promote digestive health and keep you satisfied longer.
For more detailed nutritional information and tips on incorporating this bread into your diet, check out resources like the USDA FoodData Central or NutritionData. Happy baking!
FAQs about No Knead Seeded Oat Bread
Can I leave the dough in the fridge too long?
It's perfectly fine to let your no knead seeded oat bread dough hang out in the refrigerator for up to 3 days. In fact, this longer rest can enhance the flavors and improve the texture. However, after about 2 days, you might notice some deflation, which is normal and nothing to worry about.
How should I store the leftover bread?
To keep your leftover seeded oat bread fresh, store it loosely covered at room temperature for up to 3 days. If you want it to last longer, popping it in the fridge is an option; however, it can change the texture a bit. For ideal freshness, aim to consume it within 10 days if refrigerated.
Can I freeze the dough or baked bread?
Absolutely! You can freeze both the dough and the baked bread. For the dough, follow the recipe instructions up to step 5, then wrap it tightly and freeze for up to 3 months. To bake, just thaw it overnight in the fridge. Baked bread can also be frozen; allow it to cool completely before wrapping and freezing. It’s a fantastic way to have homemade bread ready whenever you crave it!
Conclusion on No Knead Seeded Oat Bread
Final thoughts on embracing homemade bread
Baking your no knead seeded oat bread is not just about the final product; it’s an experience. Embrace the simplicity of homemade bread and enjoy the delightful aroma filling your kitchen. Each slice is not only delicious but also packed with nutrition, making it worth the effort. Dive into the world of baking; your taste buds will thank you!
Ready to experiment? Try variations like adding nuts or dried fruits for a personal touch. Who knows, your no knead seeded oat bread might just become the star of your kitchen!
No Knead Seeded Oat Bread
Equipment
- Mixing Bowl
- Baking Sheet
- silicone spatula
- sharp knife
- oven
Ingredients
- 3 cups bread flour (spooned & leveled)
- 2 teaspoons instant yeast Platinum Yeast from Red Star
- 1 cup old-fashioned whole rolled oats
- ¼ cup pumpkin seeds (pepitas)
- ¼ cup sunflower seeds salted or unsalted
- 2 Tablespoons flax seeds or sesame seeds
- 2 teaspoons coarse salt
- 2 Tablespoons honey
- 1 ½ cups warm water (about 95°F (35°C))
- cornmeal for dusting pan (optional)
Topping
- 1 Tablespoon old-fashioned whole rolled oats
- 1 Tablespoon pumpkin seeds (pepitas)
- 1 Tablespoon sunflower seeds
- 1 teaspoon flax seeds or sesame seeds
Instructions
- Watch the video below before you begin, and let that be your visual guide for this recipe.
- In a large un-greased mixing bowl, whisk the flour and yeast together. Add the oats, pumpkin seeds, sunflower seeds, flax seeds, and salt and whisk to combine. Mix the honey and water together, and then pour over the dry ingredients. Using a silicone spatula or wooden spoon, gently mix together until all the flour is moistened.
- Cover the dough tightly with plastic wrap or aluminum foil and set on the counter at room temperature. Allow to rise for 3 hours until nearly doubled in size.
- For best flavor, refrigerate the dough for at least 12 hours and up to 3 days.
- Dust a large nonstick baking sheet with flour or cornmeal. Shape the risen dough into a ball using floured hands.
- Transfer ball to prepared baking sheet. Mix topping ingredients together and sprinkle on top of dough, pressing in if needed. Loosely cover and rest for 45 minutes.
- Preheat the oven to 425°F (218°C).
- Using a sharp knife, score the dough with a slash or X about ½ inch deep.
- Place the shaped and scored dough in the preheated oven on the center rack.
- Optional: To create a crispier crust, place a shallow metal baking pan on the bottom oven rack and quickly pour in boiling water before shutting the oven.
- Bake for 40 minutes or until golden brown. Check for doneness by tapping to see if it sounds hollow.
- Remove from the oven and allow to cool for at least 10–20 minutes before slicing.
- Store leftovers loosely covered at room temperature for up to 3 days or refrigerated for up to 10 days.


Leave a Reply