
Introduction to Mini Pumpkin Cheese Balls
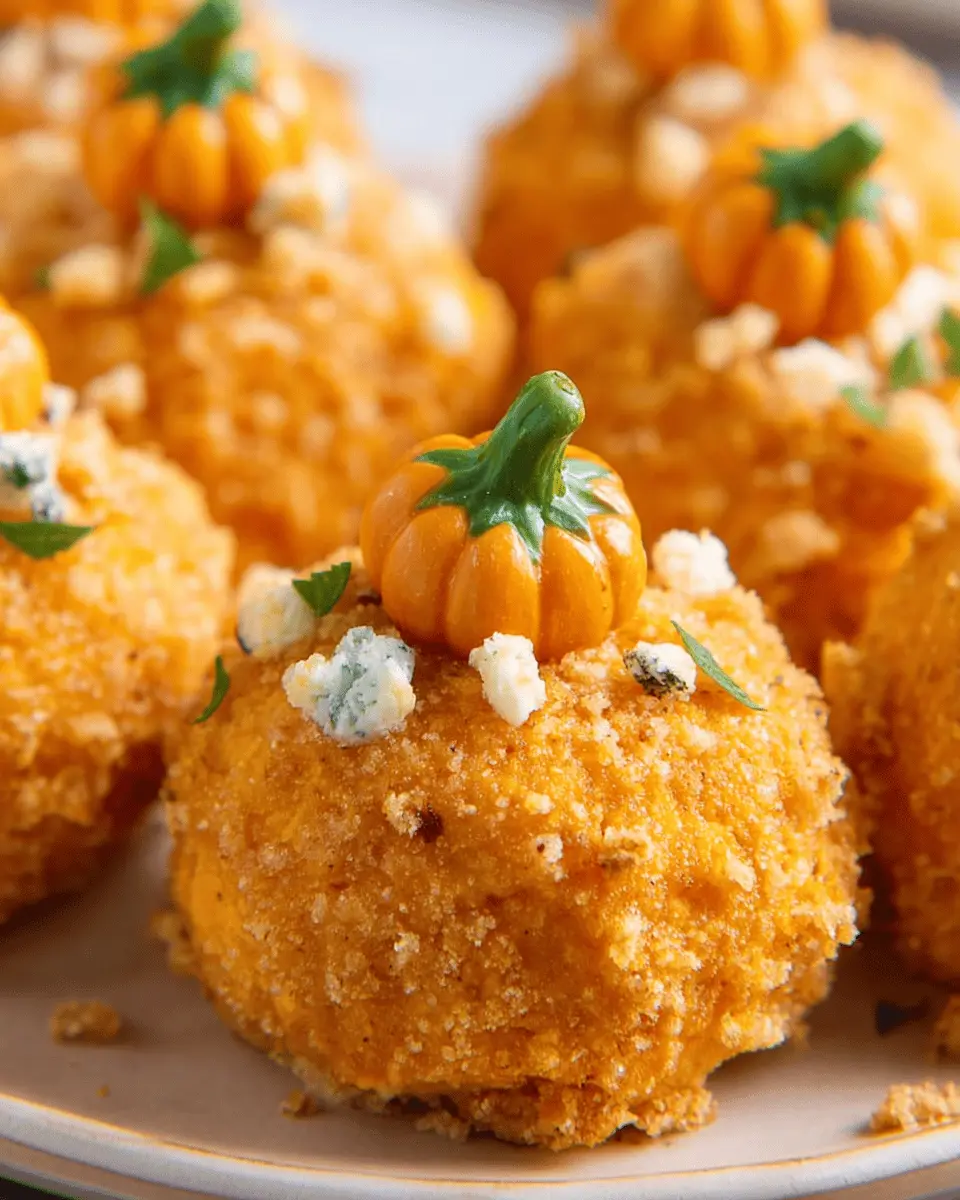
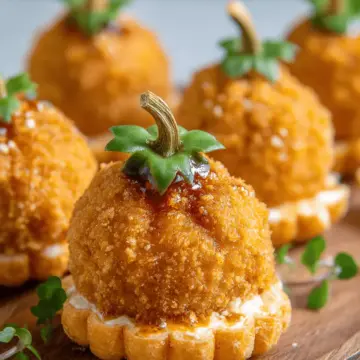
Are you on the hunt for a delightful, homemade snack that perfectly captures the essence of fall? Look no further than these adorable mini pumpkin cheese balls! Not only do they pack a flavorful punch, but they also bring a festive charm to any gathering. Their vibrant orange hue and cute pumpkin shape will definitely make you the star of the party.
Why Mini Pumpkin Cheese Balls are Perfect for Homemade Snacks
The great thing about these mini cheese balls is their simplicity. With just a handful of ingredients like cream cheese and cheddar cheese, you can whip up a batch in no time. They are easy to prepare and can be made ahead of time, leaving you free to enjoy your event stress-free. Plus, they are versatile! Pair them with a variety of dippers, such as veggies or whole-grain crackers to cater to every palate.
But let’s talk about presentation! These mini pumpkin cheese balls are not just delicious; they’re visually appealing, too. Ideal for Halloween parties, Thanksgiving gatherings, or simply as a fun snack, they add a whimsical touch to your appetizer spread. Check out this resource for more creative snack ideas that impress without the need for gourmet skills!
Ready to make your party a hit? Let’s dive into the simple recipe for these delightful snacks!
Ingredients for Mini Pumpkin Cheese Balls
Essential Ingredients You'll Need
To craft the perfect mini pumpkin cheese balls, you'll want to gather the following essential ingredients:
- 1 bar (8 oz) cream cheese, ideally at room temperature for easy mixing
- 1½ cups finely shredded cheddar cheese—medium or sharp for a flavor punch
- ¾ teaspoon paprika for warmth and color
- ½ teaspoon onion powder to enhance savory notes
- ¼ teaspoon garlic powder for that aromatic touch
- ¼ teaspoon salt to elevate the flavors
- ¼ teaspoon black pepper for a subtle kick
- 1 cup finely crushed cheese crackers (like Cheez-It or Goldfish) for that delightful crunch
- 12 pretzel sticks (broken in half) to create the pumpkin stems
- Small leaves of flat-leaf parsley (optional) for an aesthetic touch
These ingredients will come together to create delicious, eye-catching treats that are perfect for any gathering!
Optional Garnishes for Extra Flavor
While the core ingredients pack a delicious punch, you can elevate your mini pumpkin cheese balls with a few optional garnishes:
- Chopped chives or green onions for a fresh zing
- Crushed red pepper flakes if you enjoy a bit of heat
- Bacon bits or turkey bacon crumbles for a smoky flavor twist
- Pesto drizzle for an herby infusion
These easy additions can take your cheese balls from simple to stellar. Which garnish sounds most tempting to you?
Preparing Mini Pumpkin Cheese Balls
These delightful mini pumpkin cheese balls are not only cute but also scrumptiously cheesy! They're perfect for gatherings, potlucks, or just a cozy night in. Let’s walk through the steps together to make the preparation as enjoyable as the eating.
Gather Your Ingredients
Before you dive into the kitchen, it’s essential to collect everything you need. Here’s what you’ll want to have ready:
- 1 bar (8 oz) cream cheese (make sure it's at room temperature)
- 1½ cups finely shredded cheddar cheese (choose medium or sharp for flavor)
- ¾ teaspoon paprika
- ½ teaspoon onion powder
- ¼ teaspoon garlic powder
- ¼ teaspoon salt
- ¼ teaspoon black pepper
- 1 cup finely crushed cheese crackers (think Cheez-Its or Goldfish)
- 12 pretzel sticks (broken in half for the stems)
- Small leaves of flat-leaf parsley for garnish (optional)
Make sure to double-check your pantry because running out of key ingredients can throw a wrench in your culinary plans.
Mix the Cheese Mixture
Once you have your ingredients glossed and organized, it's time for the fun part: mixing! In a mixing bowl, add your softened cream cheese, cheddar cheese, paprika, onion powder, garlic powder, salt, and black pepper. A hand mixer works wonders here as it combines everything quickly and smoothly. Once mixed, cover the bowl with plastic wrap and pop it in the fridge for 15 minutes. This chilling time helps the mixture firm up a bit, making it easier to shape into balls.
Forming the Mini Cheese Balls
After the cheese mixture has chilled, it’s time to get your hands a little cheesy! Wet your hands slightly to prevent sticking and roll the mixture into small 1-inch balls. Place them on a parchment-lined baking sheet. It’s a bit like crafting tiny edible pumpkins—who knew you could feel so accomplished over cheese?
Coating Your Cheese Balls
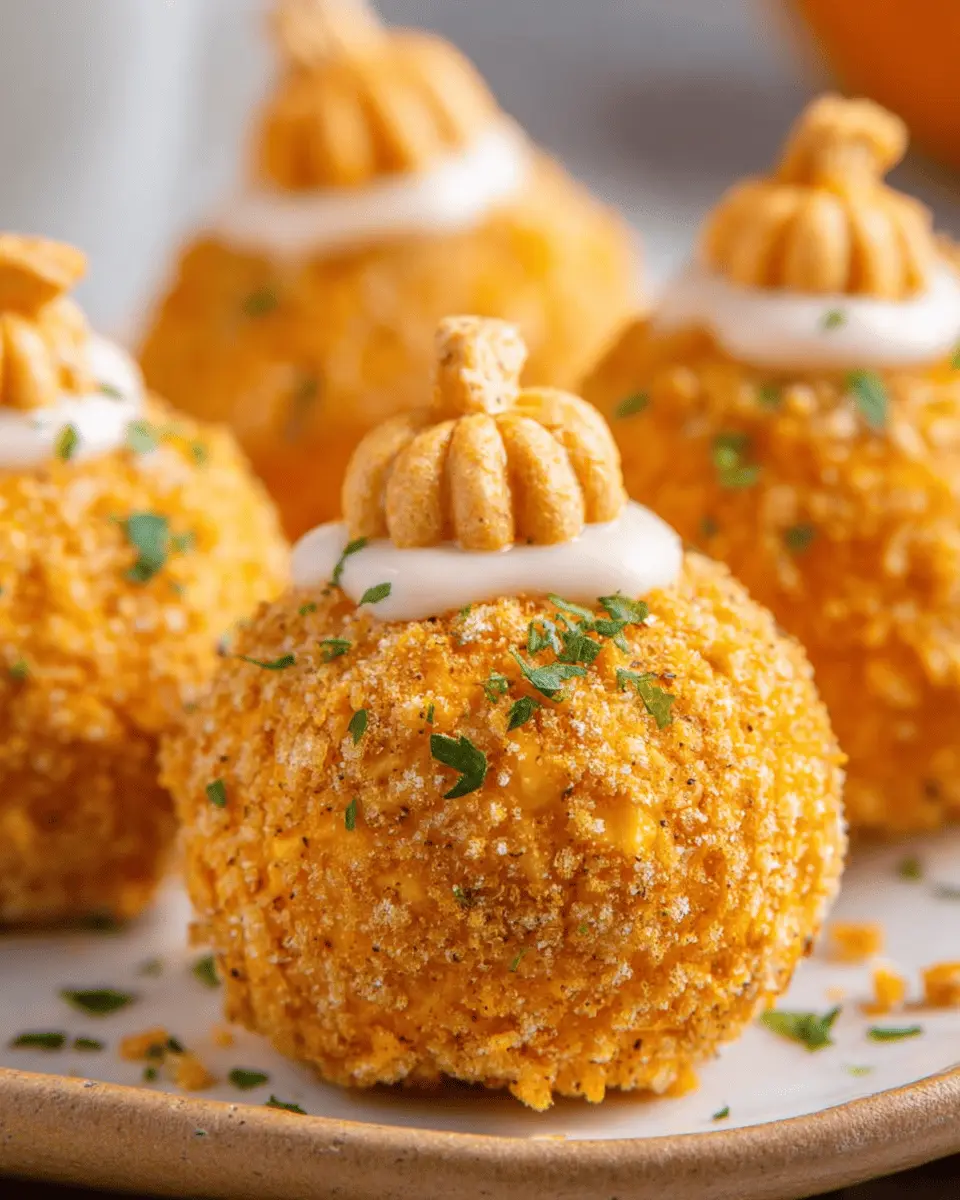
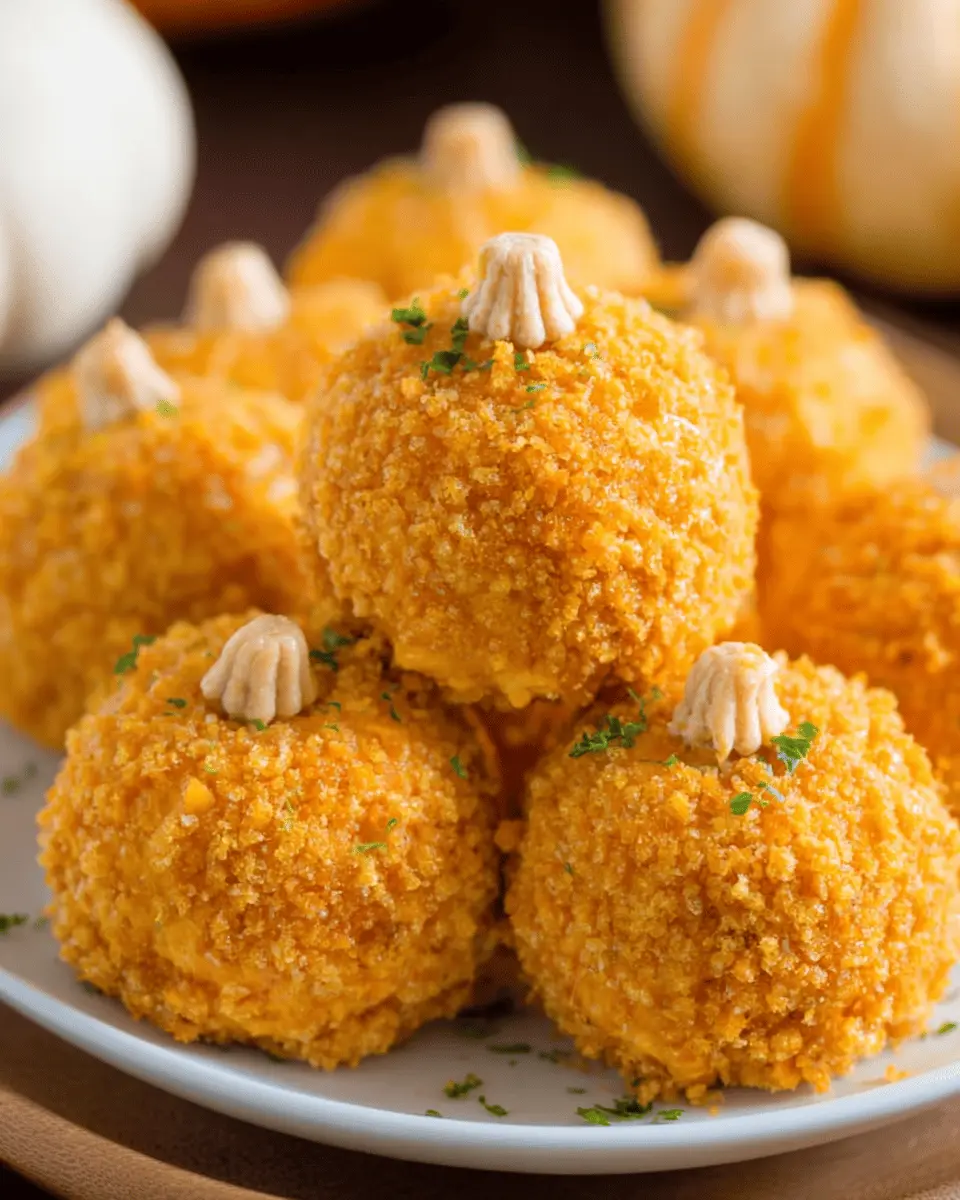
Now comes the next exciting step! Grab your crushed cheese crackers and roll each cheese ball in the crumbs until fully coated. This gives them a delightful crunch that enhances the overall texture. For the fun pumpkin effect, use the side of a toothpick to create 3-4 indents around each ball, then gently press down the top. This little trick makes your mini cheese balls look adorably like pumpkins!
Adding the Final Touches
Finally, cover your tray with plastic wrap and refrigerate until you’re ready to serve. When it’s party time, insert a pretzel stick into the top of each cheese ball for a stem, and add a parsley leaf for that finishing touch. These mini pumpkin cheese balls are best served chilled, so allow them to sit in the fridge for at least an hour before serving to keep them fresh and flavorful.
Feel free to share your thoughts and comments below! I can’t wait to hear how your mini cheese balls turn out. Happy snacking!
Variations on Mini Pumpkin Cheese Balls
Spicy Pumpkin Cheese Balls
Looking to add a little kick to your mini pumpkin cheese balls? Incorporate diced jalapeños or a dash of cayenne pepper to the cheese mixture. The heat from these ingredients beautifully complements the creamy cheese and pumpkin flavors, making them a hit at any gathering. Pair with a cool ranch dip or a refreshing cucumber salad to balance the spice!
Sweet & Savory Mini Cheese Balls
If you're in the mood for something unique, try mixing in dried cranberries or chopped apples. The sweetness of the fruit contrasts wonderfully with the savory cheese, creating delightful flavor bursts in each bite. Serve with whole-grain crackers or breadsticks, and watch your guests come back for more. For an even sweeter touch, drizzle with honey just before serving!
For more variations on cheese balls, check out Food Network or Epicurious for additional inspiration!
Cooking Tips for Mini Pumpkin Cheese Balls
Tips for Achieving the Perfect Texture
To get that creamy, dreamy texture for your mini pumpkin cheese balls, make sure your cream cheese is at room temperature before mixing. This ensures it blends smoothly with the cheddar cheese and spices. For an even fluffier texture, consider whipping the mixture a little longer until it's light and airy. If you want to experiment with flavors, add a touch of your favorite herbs or spices—just keep the balance in mind!
Storage Tips to Keep Them Fresh
To keep your mini pumpkin cheese balls fresh, store them in an airtight container in the refrigerator. These tasty bites maintain their best flavor and texture for up to three days. If you make a big batch and want to save some for later, you can freeze them for up to a month. Just remember to thaw them in the fridge before serving, and add the pretzel sticks just before enjoying to keep them crispy.
For more tips, check out resources like Food Network or Serious Eats.
Serving Suggestions for Mini Pumpkin Cheese Balls
Pairing Ideas for Your Cheese Balls
These delightful mini pumpkin cheese balls shine on their own, but pairing them enhances the experience! Think about serving them with:
- Sliced apples or pears: The sweetness balances the cheese's richness.
- Whole-grain crackers: Adds a crunchy texture.
- Vegetable sticks (carrots, celery): For a fresh, healthy crunch.
- Dips like hummus or ranch dressing bring an extra flavor dimension that guests will love.
Ideal Occasions for Serving
These mini pumpkin cheese balls are perfect for a variety of gatherings. Consider these occasions:
- Halloween parties: They add a festive touch!
- Thanksgiving appetizers: A fun twist on a traditional cheese platter.
- Game day snacks: Easy to grab and share while cheering on your team!
Hosting a gathering soon? Try whipping up these cheese balls for a guaranteed crowd-pleaser! For more tips on entertaining, check out The Spruce Eats for inspiration.
Time Breakdown for Mini Pumpkin Cheese Balls
Preparation Time
Getting those mini pumpkin cheese balls ready takes about 15 minutes. You’ll want to whip up that creamy cheese mixture, which is as easy as mixing your ingredients until smooth!
Chilling Time
After preparing, refrigerate the cheese mixture for another 15 minutes. This step is crucial for creating the right texture and enhancing the flavors.
Total Time
In total, you'll invest just 30 minutes in this recipe. So, if you're planning a get-together or a cozy night in, these delicious snacks can be ready in no time!
For more on prepping ahead, check out ideas from Food Network for tips on making party snacks!
Nutritional Facts for Mini Pumpkin Cheese Balls
These mini pumpkin cheese balls are not only adorable but also surprisingly nutritious! Here’s a quick look at their nutritional profile:
Calories
Each cheese ball contains approximately 109 calories, making them a fun yet indulgent snack for your gatherings.
Protein
Packed with 3 grams of protein, these bites can help satisfy your hunger while you mingle with friends.
Sodium
With around 186 mg of sodium, you can enjoy these savory treats without worrying too much about your salt intake.
For a closer look at how these numbers fit into your overall diet, you might find the USDA Nutrition Database helpful!
FAQs about Mini Pumpkin Cheese Balls
Can I make these cheese balls ahead of time?
Absolutely! You can prepare mini pumpkin cheese balls in advance. Just roll them up, coat in crushed cheese crackers, and store them in the fridge, covered, for up to a day before serving. This makes them a great option for parties or gatherings when you want to take some stress off your day-of cooking!
What can I substitute for cream cheese?
If you're looking for alternatives to cream cheese, consider using Greek yogurt or ricotta cheese for a lighter twist. Both options will still provide a creamy texture, although they may slightly alter the flavor. For a dairy-free alternative, try cashew cream or a store-bought vegan cream cheese.
How long do leftovers last?
Leftover mini pumpkin cheese balls can be enjoyed for up to three days when stored in an airtight container in the refrigerator. For best results, add the pretzel sticks just before serving to keep them crunchy. Enjoy your yummy snacks!
For more tips on food storage, check out resources like the USDA's food safety guidelines.
Conclusion on Mini Pumpkin Cheese Balls
In summary, these mini pumpkin cheese balls are a delightful snack perfect for parties or cozy gatherings. Easy to prepare and bursting with flavor, they're sure to impress your guests. Don't forget to serve them chilled for the best taste, and enjoy the festive cheer they bring to your table.
For more festive recipes, check out Food Network or AllRecipes for inspiration!
Mini Pumpkin Cheese Balls: Easy and Delicious Fall Appetizer
Equipment
- Mixing Bowl
- electric hand mixer
- parchment paper
Ingredients
Cheese Mixture
- 1 bar cream cheese room temperature
- 1.5 cups finely shredded cheddar cheese medium or sharp cheddar
- 0.75 teaspoon paprika
- 0.5 teaspoon onion powder
- 0.25 teaspoon garlic powder
- 0.25 teaspoon salt
- 0.25 teaspoon black pepper
Coating and Garnish
- 1 cup finely crushed cheese crackers cheez-it or goldfish crackers
- 12 pieces pretzel sticks broken in half
- small leaves of flat-leaf parsley optional garnish
Instructions
Preparation
- In a mixing bowl add the cream cheese, cheddar cheese, paprika, onion powder, garlic powder, salt, and pepper. Use an electric hand mixer to beat until combined and smooth. Cover the bowl with plastic wrap or a lid and refrigerate for 15 minutes.
- Roll the cheese ball mixture into small 1-inch balls and place them onto a parchment-lined baking sheet.
- Working one cheeseball at a time, roll it in the crushed cheese crackers until it's well coated.
- Use the side of a toothpick to make 3-4 indents around the cheese ball. Put the cheese ball back onto the parchment-lined baking sheet and gently press the top down. As you do this, the indents will become more noticeable and it will make the mini cheese ball look more like a pumpkin shape. Repeat with the remaining cheese balls.
- Cover the tray with plastic wrap and refrigerate the cheese balls until ready to serve. When ready to serve, gently push a pretzel stick into the top of each pumpkin cheese ball. Place a parsley leaf (if using) to the side of the pretzel stick.
- These are best served chilled from the fridge. I like to serve them after they have chilled for about 1 hour. Do not add the pretzel stick until right before serving to prevent them from getting soggy.
Leave a Reply