
Introduction to Mexican Wedding Cookies
What are Mexican Wedding Cookies?
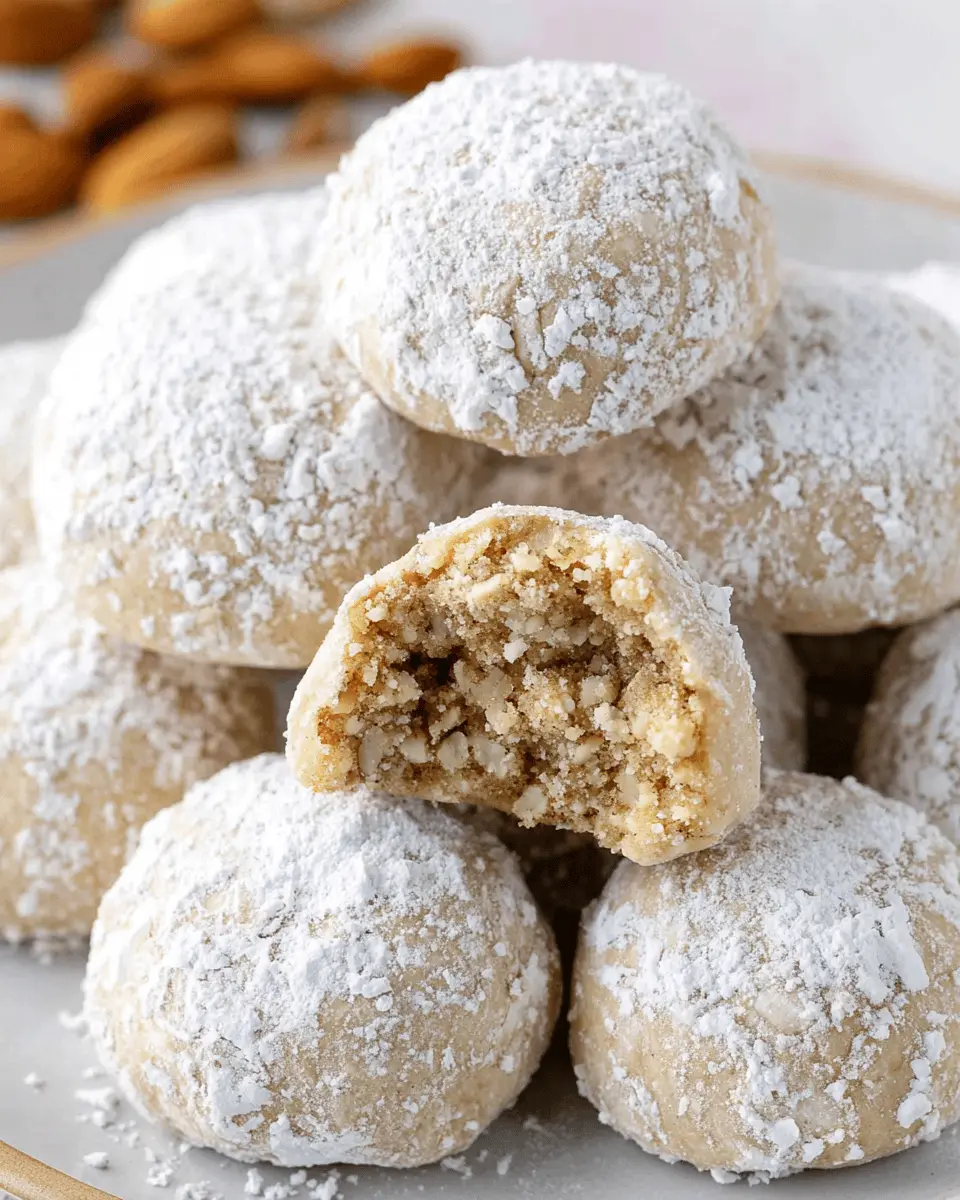
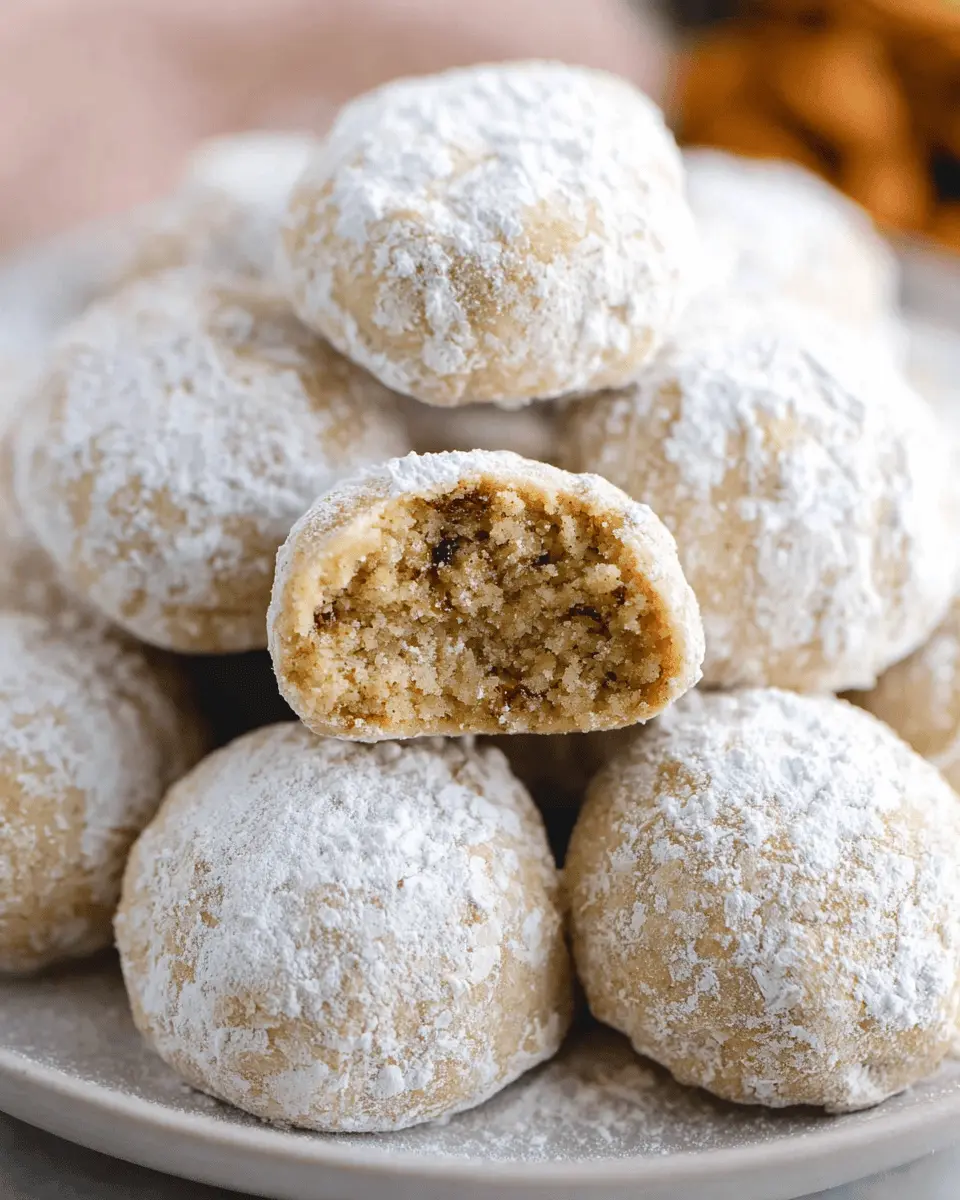
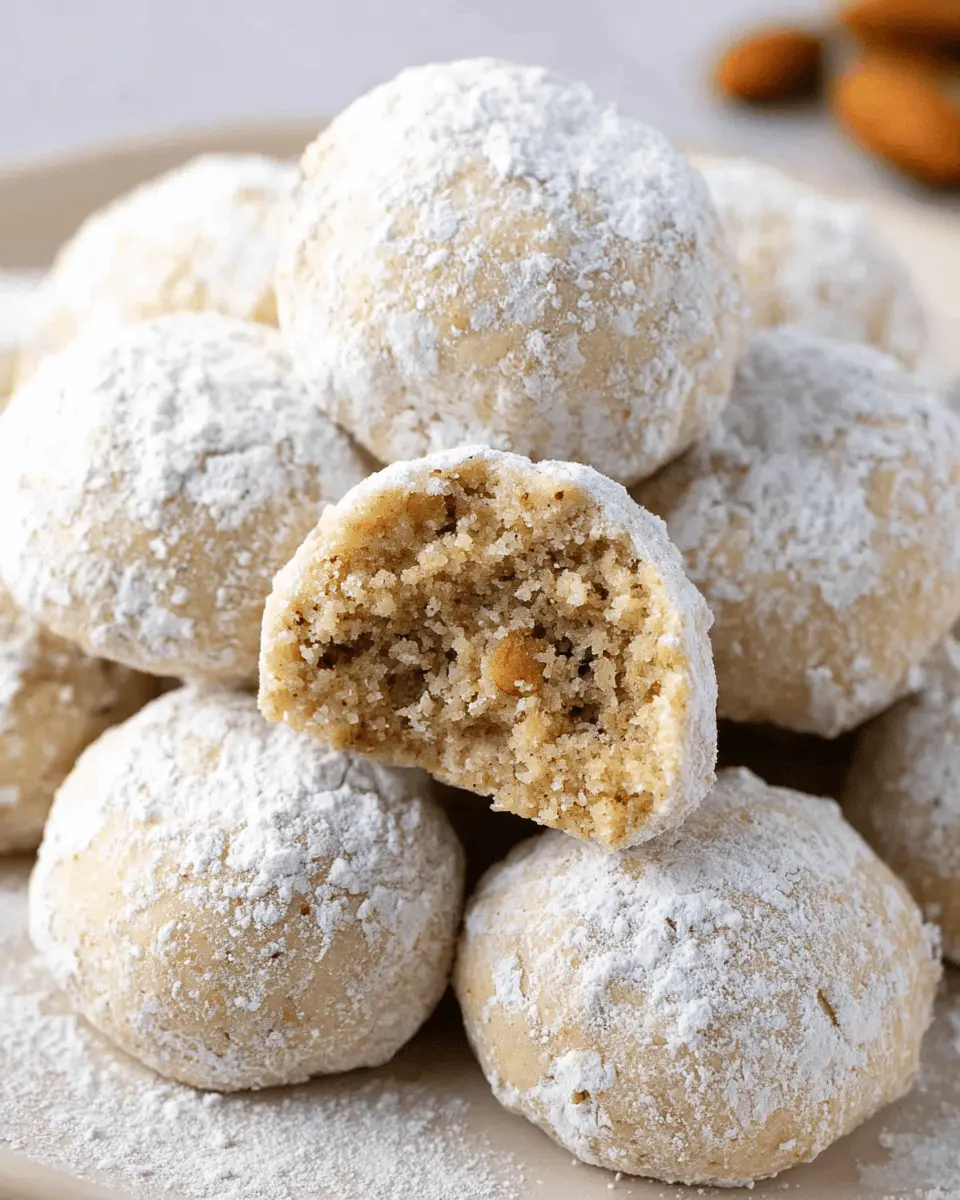
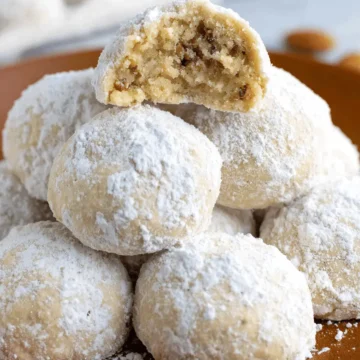
Mexican Wedding Cookies, also known as polvorones or snowball cookies, are delightful treats that have a perfect balance of buttery goodness and nutty flavor. These round, crumbly cookies are typically made with ground nuts, like walnuts or pecans, and generously rolled in powdered sugar, creating a snow-covered appearance that’s both beautiful and delicious. With a rich, melt-in-your-mouth texture, they’re an irresistible addition to any dessert table.
A Brief History of These Delightful Treats
Traditionally served at weddings and festive gatherings across Mexico, these cookies have a cultural significance rooted in celebration. Their origins trace back to Spanish polvorones, with adaptations made over generations. Many Mexican families have their unique versions of the recipe, often passed down through the years. Interestingly, they symbolize wealth and happiness, making them a thoughtful gift for newlyweds or during festive occasions. You can find a richer exploration of their history in sources like Tex-Mex Cooking to learn more about their cultural significance.
As you explore baking these cookies, consider how they bring together flavors that have stood the test of time, all while encouraging warmth, joy, and community—traits that resonate strongly in Mexican culture. Ready to try your hand at making these goodies? Let’s jump into the full recipe!
Ingredients for Mexican Wedding Cookies
Essential ingredients
To whip up delicious Mexican wedding cookies, you need some basic yet delightful ingredients that create that melt-in-your-mouth experience. Here’s what you’ll need:
- Walnut Halves: 2 cups provide a rich, nutty flavor.
- All-Purpose Flour: 2 cups give structure to these tender treats.
- Kosher Salt: A half teaspoon balances the sweetness.
- Unsalted Butter: 1 cup, softened for the perfect creamy texture.
- Granulated Sugar: ⅓ cup sweetens the dough without overpowering it.
- Pure Vanilla Extract: 2 teaspoons elevate the overall flavor.
- Powdered Sugar: 1 cup for rolling and extra sweetness post-baking.
These ingredients work together harmoniously, allowing each bite to deliver both richness and delicacy.
Possible substitutes
Don’t fret if you’re missing an ingredient; there are easy substitutes! Try pecans instead of walnuts for a different nutty twist. For a gluten-free version of your Mexican wedding cookies, simply swap all-purpose flour with a gluten-free alternative like Bob’s Red Mill 1:1 baking flour. If you're short on time, consider using pre-roasted walnuts to skip the roasting step altogether.
For more tips on ingredient alternatives, check out resources from Serious Eats. By using these substitutes, you can customize your cookies without compromising on taste!
Step-by-step Preparation of Mexican Wedding Cookies
Making Mexican Wedding Cookies is an enjoyable process, easy enough for bakers of any skill level. With a few simple steps, you'll have a batch of these delightfully buttery and nutty treats in no time. Let’s take a closer look at how to prepare them perfectly.
Preheat the oven and prepare baking sheets
Start by preheating your oven to 325°F (160°C). It’s crucial to allow your oven to reach the right temperature, ensuring even baking. While the oven heats up, line two baking sheets with parchment paper. This prevents the cookies from sticking and makes clean-up a breeze. Trust me, it’s worth the extra few minutes!
Roast the walnuts for enhanced flavor
To elevate the rich taste of your Mexican Wedding Cookies, roasting the walnuts is a game changer. Spread 2 cups of raw walnut halves on a small baking sheet and place them in the oven for about 6 minutes, stirring halfway through. This quick step brings out the nuts' natural oils, resulting in a deeper flavor. Once they’re golden and fragrant, let them cool for about 10 minutes on a plate.
Process the nuts and combine with flour
Next, it's time to chop those walnuts! In a food processor, pulse 1 cup of the cooled walnuts until finely ground (about 15 times). This gives your cookies a smooth texture. Transfer these finely ground nuts to a bowl, then add the remaining cup and pulse them until roughly chopped. Combine the two with 2 cups of all-purpose flour and a pinch of kosher salt. This nut and flour mixture will form the base of your dough.
Cream butter and sugar for a rich dough
In your mixing bowl, cream together 1 cup of softened unsalted butter and ⅓ cup of granulated sugar using a stand mixer or hand mixer set to medium speed. Mix for about 3 minutes or until it's light and fluffy. Don't forget to scrape down the sides halfway through to ensure everything is well incorporated. This step is essential; it builds the foundation for a rich, buttery dough.
Combine the ingredients and form the cookies
Now, it’s time to blend the flavors! Add 2 teaspoons of pure vanilla extract to your butter mixture. Stir in the walnut-flour mixture and combine on low speed until everything is just mixed, taking care not to overwork the dough. Use a tablespoon to measure leveled portions and roll them into 1-inch balls. Place the dough balls about an inch apart on your prepared baking sheets—this allows them to spread perfectly.
Bake the cookies to perfection
Pop the trays in the oven and let them bake for about 16 to 18 minutes, or until they turn a lovely light golden color. Remember to rotate the pans halfway through baking for even results. After baking, allow the cookies to cool on the pans for 5 minutes to set up before you roll them in sugar.
Finish with a sugary coating
The final touch makes all the difference! Once slightly cooled, roll each cookie in a bowl of powdered sugar until they are fully coated. For an added touch of sweetness and elegance, you can roll them in sugar again right before serving. This second coating not only enhances the flavor but also gives your Mexican Wedding Cookies that beautiful snow-dusted appearance.
And voilà! You’ve made delicious Mexican Wedding Cookies that are sure to impress friends and family alike. Enjoy sharing these little bites of sweetness at your next celebration or cozy gathering!
For more baking tips, check out sources like King Arthur Baking or Serious Eats for expert advice on cookie preparation techniques.
Variations on Mexican Wedding Cookies
Using Different Nuts for Unique Flavors
While traditional Mexican wedding cookies are often made with walnuts, experimenting with different nuts can introduce delightful new flavors. For a buttery richness, try using pecans, or opt for hazelnuts for a hint of earthiness. Almonds can also add a subtle sweetness that pairs beautifully with the powdered sugar coating. Don’t hesitate to mix and match; a combination of your favorites can create a custom cookie that’s uniquely yours!
Gluten-Free and Dairy-Free Alternatives
If you're seeking gluten-free or dairy-free options, it’s easier than you think! Substitute the all-purpose flour with a quality gluten-free flour blend like Bob’s Red Mill 1:1 baking flour. For a dairy-free rendition, swap the unsalted butter with coconut oil or a plant-based butter substitute. These changes ensure that everyone can enjoy the delight of Mexican wedding cookies without compromising on taste. Curious to learn more about gluten-free baking? Check out resources from sites like Gluten-Free Living for tips and tricks!
Cooking Tips and Notes for Mexican Wedding Cookies
Make-ahead strategies for easier baking
To simplify your baking experience, consider preparing the Mexican wedding cookies dough in advance. You can refrigerate rolled cookie dough for up to five days or freeze it for up to one month. Just make sure to defrost it before baking. This way, you can whip up a batch of cookies whenever a sweet craving strikes!
Tips for achieving the perfect texture
For cookies that melt in your mouth, the texture is key. Ensure your butter is softened to the right temperature (60 to 65ºF) for optimal creaming with sugar. This process really helps create a light and fluffy dough. Additionally, be careful not to overmix once adding the flour and nuts — mixing just until combined will keep your Mexican wedding cookies tender. For more tips, check out this detailed guide on cookie textures from Serious Eats.
Serving Suggestions for Mexican Wedding Cookies
Pairing with Beverages
Enjoy Mexican Wedding Cookies with a steaming cup of coffee or a soothing herbal tea. The buttery richness of the cookies deliciously complements the bold flavors of a dark roast or the subtle notes of chamomile. If you’re looking for something refreshing, try pairing them with iced tea or a creamy vanilla latte. Each sip perfectly enhances the nutty texture and sweetness of the cookies, creating a delightful afternoon treat.
Creative Ways to Present Your Cookies
Presenting your Mexican Wedding Cookies can be just as delightful as eating them! Consider stacking them on a decorative cake stand, dusted with extra powdered sugar for a charming look. For a festive touch, place them in clear gift bags tied with colorful ribbons, making them perfect for sharing at parties or holidays. Another fun idea? Arrange them on a rustic wooden board with seasonal fruits and nuts to create an inviting dessert spread that captures the essence of celebration!
Time Breakdown for Mexican Wedding Cookies
Preparation time
These delightful Mexican wedding cookies take about 1 hour to prepare. This includes roasting the walnuts, mixing the dough, and portioning the cookies.
Cooking time
After prep, the baking process takes approximately 24 minutes. You’ll bake until they’re lightly golden and slightly firm to the touch.
Total time
In total, you’ll spend around 1 hour and 24 minutes creating these sweet treats. Perfect for impressing guests or enjoying with a cup of coffee!
Nutritional Facts for Mexican Wedding Cookies
When indulging in Mexican Wedding Cookies, it's essential to consider their nutrition profile to balance enjoyment with health. Each delightful cookie contains approximately:
Calories
- Each cookie has about 64 calories. This makes them an excellent treat without guilt.
Fat Content
- With 4 grams of fat per cookie, these cookies feature a rich, buttery flavor primarily from unsalted butter.
Sugar Levels
- They contain around 2 grams of sugar, keeping the sweetness subtle and allowing the nutty flavor to shine through.
For more information on balanced snacking, check out articles from the Harvard T.H. Chan School of Public Health. Enjoy your cookies mindfully!
FAQs about Mexican Wedding Cookies
Can I make these cookies in advance?
Absolutely! You can prepare the dough ahead of time. Simply roll it into balls and refrigerate them in an airtight container for up to 5 days. If you want to make a larger batch, freeze the rolled dough for up to a month. Just defrost before baking to enjoy fresh Mexican Wedding Cookies anytime you crave them!
What is the best way to store them?
To keep your cookies fresh, store them in an airtight container at room temperature for up to 5 days. If you find yourself with leftovers, you can freeze them for up to a month before coating in powdered sugar. When you’re ready to enjoy, simply let them thaw and then coat them for that delightful sweetness.
Are there suitable alternatives to walnuts?
If you’re not a fan of walnuts or need a nut-free option, pecans are a great substitute that will deliver a similar flavor and texture. You could also consider using sunflower seeds for a nut-free version while maintaining that beloved crunch. Getting creative is part of the fun!
Conclusion on Mexican Wedding Cookies
In summary, Mexican Wedding Cookies are a delightful treat perfect for any occasion. Their simple ingredients and easy preparation make them a must-try. Whether you enjoy them with friends or introduce them at a festive gathering, they are sure to bring joy and sweetness to your table. Happy baking!
Mexican Wedding Cookies: Easy and Indulgent Treats to Cherish
Equipment
- oven
- food processor
- stand mixer or hand mixer
- baking sheets
- parchment paper
- shallow bowl
- wire rack
Ingredients
- 2 cups raw walnut halves divided
- 2 cups all-purpose flour
- ½ teaspoon kosher salt
- 1 cup unsalted butter softened to 60 to 65ºF (16 to 18ºC)
- ⅓ cup granulated sugar
- 2 teaspoons pure vanilla extract
- 1 cup powdered sugar more as needed for rolling
Instructions
- Preheat the Oven - Set the oven rack to both the upper-middle and lower-middle position. Preheat to 325ºF (160°C). Line two baking sheets with parchment paper and set aside.
- Roast the Walnuts - Place the walnuts in the oven on a small baking sheet for 6 minutes, stirring halfway through. Transfer to a plate and allow them to cool for 10 minutes.
- Crush the Nuts - Add 1 cup of walnuts to a food processor and pulse about 15 times until finely ground texture is achieved. Transfer to a medium-sized bowl. Add the remaining 1 cup of walnuts to the food processor and pulse 3 to 5 times until roughly chopped. Combine them with finely ground walnuts. Add flour and salt to the walnuts, and stir to combine.
- Mix the Butter and Sugar - Using the paddle attachment on a stand mixer or hand mixer, cream the softened butter and granulated sugar on medium speed, 3 minutes. Scrape down the sides of the bowl halfway through.
- Add the Crushed Nuts - Add vanilla and mix on low speed until incorporated, 30 seconds. Add the walnut mixture and combine on low speed until just incorporated and the dough comes together, 30 seconds.
- Portion the Cookie Dough - Measure the dough into leveled 1 tablespoon (15g, ½ ounce) portions. Roll into balls about 1" in diameter, and place 1" apart on the baking sheets. Place 20 to 23 cookies per pan.
- Bake - Bake until lightly golden in color and the bottoms are browned, about 16 to 18 minutes. Rotate the pans and switch positions halfway through. Cool the cookies on the pan for 5 minutes.
- Roll in Powdered Sugar - Add powdered sugar to a shallow bowl. Roll the cookies inside while still warm until completely coated, then transfer them to a wire rack to cool. Once cooled, roll them in powdered sugar for a second coat or sprinkle on top with more sugar, shaking off any excess. This can be done right before serving for the most attractive appearance.


Leave a Reply