
Introduction to Key Lime Pie
If you're seeking a delectable dessert that embodies sunshine and relaxation, look no further than key lime pie. This mouthwatering treat features a bright and tangy filling nestled in a buttery graham cracker crust, making it a perfect choice for the vibrant lifestyles of young professionals. After a long week, there's nothing quite like slicing into a chilled pie and indulging in its refreshing flavors, transporting you to a tropical paradise with each bite.
Why Key Lime Pie is the Perfect Treat for Young Professionals
With busy schedules and demanding deadlines, many young professionals find solace in quick yet satisfying recipes. Key lime pie fits the bill beautifully, as it combines simple ingredients with minimal prep time. Imagine spending your afternoon crafting a luscious filling while your crust bakes to golden perfection.
Moreover, this dessert appeals to a wide audience—its creamy texture and tangy notes are crowd-pleasers at gatherings, making it an excellent choice for potlucks or dinner parties. Want to impress your colleagues or friends? Serve up slices draped in airy whipped cream and garnished with fresh lime slices. For inspiration and tips, check out resources from culinary experts on How to Make Perfect Whipped Cream.
Incorporating key lime pie into your repertoire can elevate your culinary skills while providing a delightful escape. So, why not whip one up today?
Ingredients for Key Lime Pie
When it comes to making a delicious key lime pie, having the right ingredients can make all the difference. Let’s break down what you'll need for each component of this tasty dessert.
For the Crust
Creating the perfect crust is essential for a great key lime pie. Here’s what you’ll need:
- 1½ cups finely crushed graham cracker crumbs (from about 12 whole graham crackers)
- ⅓ cup (packed) light brown sugar
- 4 tablespoons unsalted butter, melted
For the Filling
The filling is where the magic happens! Gather the following:
- Two 14-oz cans sweetened condensed milk
- 1 cup plain Greek yogurt (2% or whole milk works best)
- 1 tablespoon grated lime zest
- ¾ cup fresh lime juice
For the Topping
No pie is complete without a luscious topping. For this, you will need:
- 1 cup cold heavy cream
- 2 tablespoons confectioners' sugar
- 1 teaspoon grated lime zest
- 8 to 10 thin lime slices for garnish
Now that you have everything you need, you’re just a few steps away from enjoying a homemade key lime pie! For those looking to dive deeper into the benefits of lime juice or Graham crackers, check out Healthline and Wikipedia. Happy baking!
Preparing Key Lime Pie
Creating a delightful key lime pie at home is not only rewarding but also surprisingly simple! Follow these steps carefully, and you’ll find yourself with a scrumptious dessert that is perfect for any occasion.
Step 1: Preparing the Crust
Begin this delightful journey by preheating your oven to 375°F (190°C). This is crucial for achieving that perfect crust. In a medium bowl, mix the finely crushed graham cracker crumbs, light brown sugar, and melted unsalted butter. Stir with a fork initially, then switch to using your hands to ensure it’s well combined.
Using your fingers (and perhaps the bottom of a glass or dry measuring cup), press the mixture firmly into the bottom and up the sides of a 9 x 1½-inch pie pan. Aim for about a ¼-inch thickness. A little tip: start with the sides before moving on to the bottom. Once you’ve got the shaping done, pop it in the oven and bake for 10 minutes, until it’s just slightly browned. Let it cool on a wire rack while you work on the filling.
Step 2: Making the Filling
Now that the crust has cooled, lower the oven temperature to 350°F (180°C). In a large mixing bowl, combine the two cans of sweetened condensed milk, plain Greek yogurt, lime zest, and fresh lime juice. Whisk this mixture together until it’s smooth and thick. Pour it into your warm graham cracker crust, making sure to spread it evenly.
Bake for about 15 minutes; the filling should be set but still slightly wobbly in the center. After it’s done, let it cool at room temperature for 30 minutes before transferring it into the fridge for at least 3 hours to chill thoroughly.
Step 3: Chilling the Pie
This step is vital. Chilling allows all those delightful flavors to meld together and also gives your filling that perfect texture. While the pie is chilling, you can take a little moment to contemplate how wonderful it’s going to taste!
Step 4: Preparing the Topping
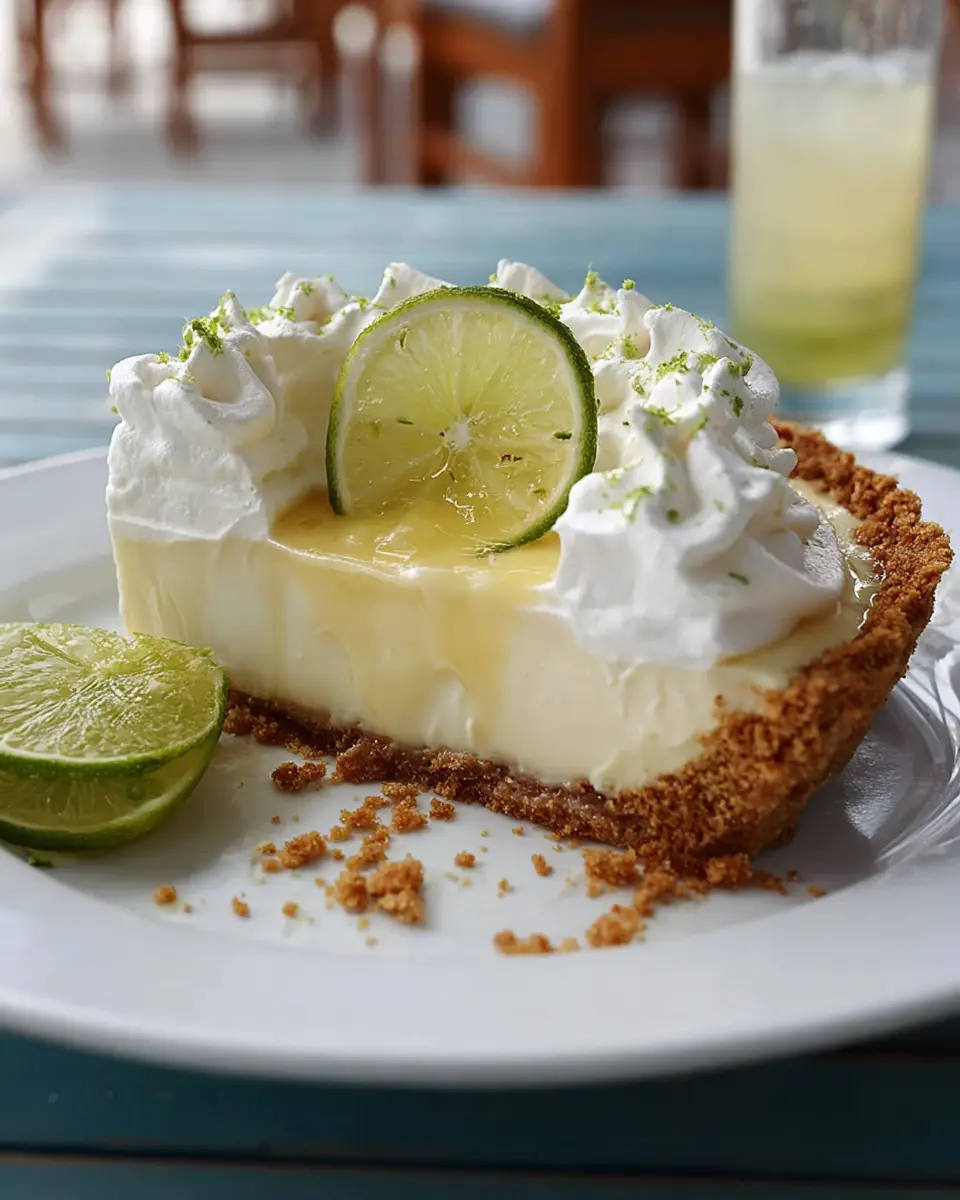
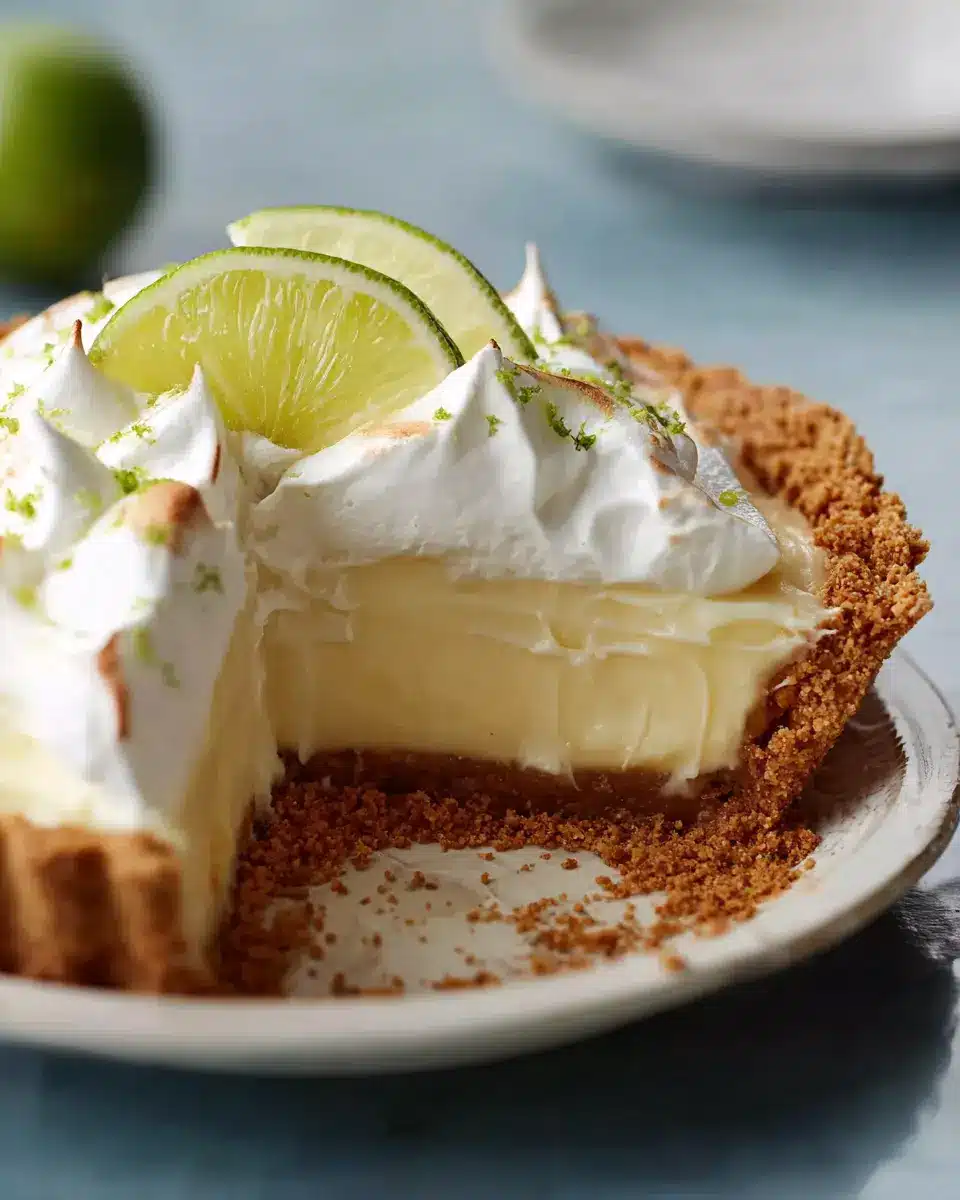
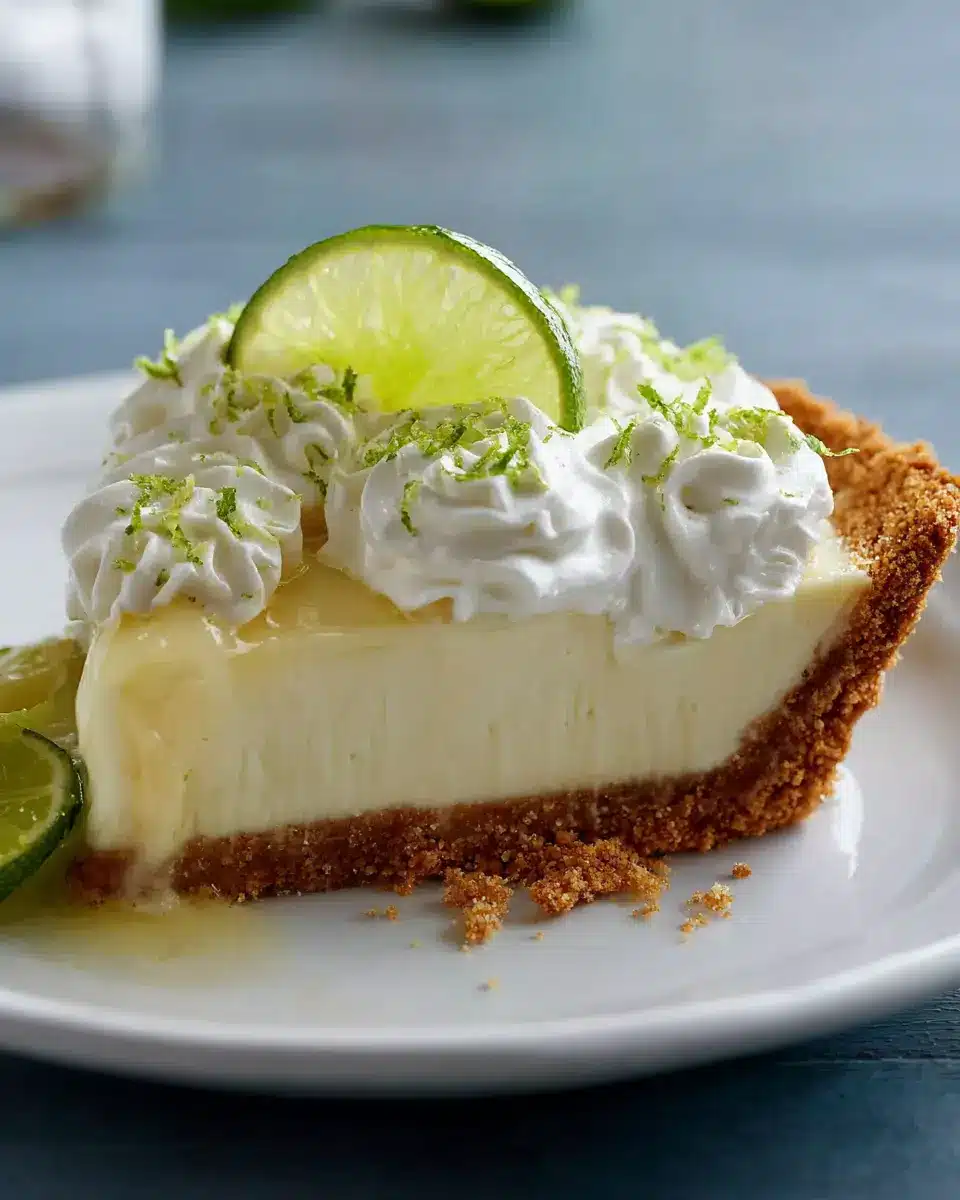
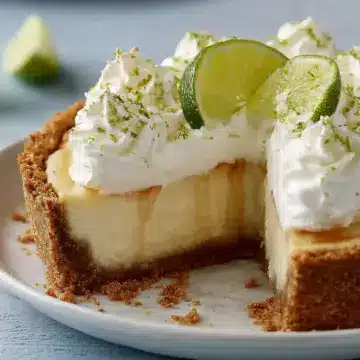
Once your pie is fully chilled, it’s time to whip up some delicious topping. In the bowl of an electric mixer, beat cold heavy cream until you see soft peaks. Gradually add confectioners' sugar and then continue to beat until you achieve medium peaks. Top your chilled pie generously with this whipped cream, and don’t forget to garnish with some extra lime zest and a few thin lime slices!
And there you have it! Your very own homemade key lime pie, ready to be sliced and served. Make sure to keep it in the refrigerator until it’s time to enjoy. Perfect for summer nights or any gathering, you’ll impress everyone with your culinary skills!
For the full recipe and more tips, consider checking out resources like Taste of Home or Food Network.
Variations on Key Lime Pie
Tropical Key Lime Pie with Coconut
Elevate your traditional key lime pie by incorporating toasted coconut flakes into the crust and topping. The subtle sweetness of coconut beautifully complements the tartness of lime. Simply mix some coconut into the graham cracker crust for an added crunch, and sprinkle more on top of your whipped cream for that tropical touch. If you’re in the mood for something creamier, you can whip in a hint of coconut cream too, making it a delightful twist that transports you straight to the beach!
Vegan Key Lime Pie Alternative
Craving a plant-based option? This vegan key lime pie alternative is just as delicious. Use coconut milk or silken tofu blended with lime juice and agave nectar for the filling, providing that perfect creamy texture. For the crust, substitute traditional ingredients with almond flour or oats, sweetened with a bit of maple syrup. Not only is this variation incredibly simple, but it’s also a guilt-free treat that everyone can enjoy! Explore more about vegan ingredients here.
By trying these variations, you'll discover new favorites that keep the spirit of classic key lime pie while introducing fun, fresh flavors. Give them a shot and let your taste buds have some fun!
Cooking Tips and Notes for Key Lime Pie
Tips for Achieving the Perfect Crust
To craft the ultimate key lime pie crust, ensure your graham cracker crumbs are finely crushed—this helps achieve a uniform texture. Mixing the crumbs with melted butter and brown sugar creates a rich flavor but don’t over-mix; just combine until it resembles wet sand. Remember, when pressing the mixture into your pie pan, start with the sides for even thickness.
Common Mistakes to Avoid While Baking
Everyone wants a perfect pie! Avoid these common pitfalls: First, don’t skip chilling the pie after baking; it’s essential for setting the filling. Also, be cautious not to overbake—the filling should jiggle slightly when done. If you’re curious about pie baking techniques, consider exploring resources like Serious Eats for expert tips. With these pointers, your key lime pie will surely impress!
Serving Suggestions for Key Lime Pie
Ideal Accompaniments to Enhance the Flavor
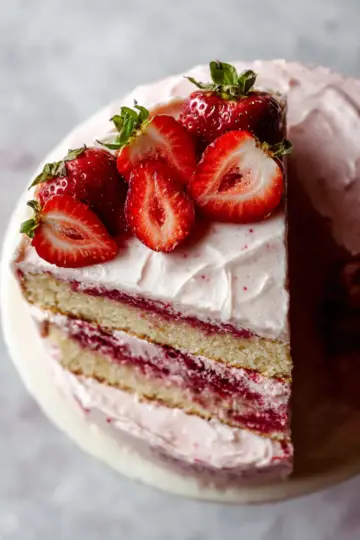
To elevate your key lime pie, consider pairing it with fresh fruits like strawberries or raspberries for a pop of color and complementary sweetness. A dollop of whipped cream is a classic choice, while toasted coconut flakes add an exciting crunch. For a zesty kick, serve with a side of lime sorbet or a refreshing mint tea. Don't forget about beverages—iced tea or soda water with lime slices can be wonderfully refreshing alternatives as you savor every bite.
Presentation Ideas for a Beautiful Dessert
For a stunning display, serve your key lime pie in a chilled glass pie dish, garnished with lime slices and a sprinkle of zest. Use a decorative pie knife to make clean, elegant cuts, and consider placing each slice on a colorful dessert plate. Surround the pie with additional fruit or edible flowers for an eye-catching presentation that will impress your guests. For a unique twist, try serving mini versions in individual cups, perfect for parties and gatherings!
For more on perfecting your pie-making experiences, check out this guide for all things pie-related!
Time breakdown for Key Lime Pie
Preparation time
This delightful key lime pie requires about 20 minutes of prep. You’ll be mixing and measuring those ingredients with ease, so don’t rush—it’s all part of the fun!
Baking time
Once your crust is prepped and the filling is ready, bake the pie for approximately 25 minutes. First, the crust needs 10 minutes, followed by 15 minutes for the filling.
Cooling time
After baking, let your pie cool at room temperature for 30 minutes, then chill it in the refrigerator for at least 3 hours. This helps the flavors meld beautifully, ensuring a refreshing treat!
For more details on perfecting your key lime pie, consider checking out sources like the USDA's Food Safety guidelines for cooling times to ensure food-safety excellence. Who knew making pie could also be a learning experience? Enjoy your baking journey!
Nutritional Facts for Key Lime Pie
When indulging in a slice of key lime pie, it’s essential to know what you’re treating your taste buds to. Here’s a quick overview of the nutritional facts, helping you enjoy this delightful dessert mindfully.
Calories
Each slice of this delectable pie contains approximately 300 calories, making it a perfect indulgence without going overboard.
Protein
With around 4 grams of protein per slice, the Greek yogurt adds a creamy texture while contributing valuable protein to your treat.
Sugar Content
One slice packs about 25 grams of sugar, balancing the tartness of the limes and ensuring that each bite is sweet and satisfying.
For more detailed nutritional insights, including serving sizes and dietary recommendations, you can check out resources like the USDA Food Data Central or consult a nutritionist for personal advice. Enjoy your key lime pie with a sense of balance and flavor!
FAQs about Key Lime Pie
What's the best way to store Key Lime Pie?
To keep your key lime pie fresh and delicious, store it in the refrigerator. Cover it with plastic wrap or aluminum foil to prevent it from absorbing any strong odors from the fridge. Enjoy your pie within 3–4 days for the best taste and texture. If you want to make it ahead of time, consider preparing the crust a day in advance, as this helps maintain its crispy edge.
Can I use bottled lime juice instead of fresh?
While we always recommend fresh lime juice for that zesty flavor, you can use bottled lime juice in a pinch. However, be aware that the taste may not be as bright or vibrant as with fresh limes. To learn more about the differences, check out resources from culinary experts like Serious Eats.
How can I fix a runny Key Lime Pie?
If your key lime pie turns out runny, it might be due to insufficient baking time or not enough thickening agent. To salvage it, try returning the pie to the oven for a few extra minutes until set. Alternatively, you can mix a little cornstarch with egg yolk in your filling next time, which can help provide that perfect texture. Enjoy your baking journey!
Conclusion on Key Lime Pie
Recap of why homemade Key Lime Pie is worth it
Indulging in homemade key lime pie elevates your dessert experience. The vibrant tang of fresh limes paired with creamy filling and a buttery graham cracker crust creates a flavor masterpiece. Plus, crafting it yourself brings a sense of accomplishment and joy—and let’s not forget the compliments you’ll receive!
For more delicious dessert ideas, check out Serious Eats or Bon Appétit for creative inspiration.
Key Lime Pie
Equipment
- 9 x 1½-in pie pan
- Electric mixer
Ingredients
For the Crust
- 1.5 cups finely crushed graham cracker crumbs from about 12 whole graham crackers
- ⅓ cup light brown sugar packed
- 4 tablespoons unsalted butter melted
For the Filling
- 2 cans sweetened condensed milk 14-oz cans
- 1 cup plain Greek yogurt 2% or whole milk
- 1 tablespoon grated lime zest
- ¾ cup fresh lime juice
For the Topping
- 1 cup cold heavy cream
- 2 tablespoons confectioners' sugar
- 1 teaspoon grated lime zest
- 8 to 10 slices thin lime slices
Instructions
Make the Crust
- Preheat oven to 375°F (190°C) and set an oven rack in the middle position.
- In a medium bowl, combine the graham cracker crumbs, brown sugar, and melted butter; stir with a fork first, and then your hands until well combined.
- Press the crumbs firmly into the bottom and up the sides of the pie pan to form a crust.
- Bake for 10 minutes, until just slightly browned. Let the crust cool on a wire rack.
Make the Filling
- Lower the oven temperature to 350°F (180°C). In a large bowl, whisk together the sweetened condensed milk, yogurt, lime zest, and lime juice.
- Pour the mixture into the warm graham cracker crust. Bake for 15 minutes, until the filling is almost set.
- Let cool at room temperature for 30 minutes, then refrigerate for about 3 hours until chilled.
Make the Topping
- In the bowl of an electric mixer, beat the heavy cream until soft peaks form.
- Add the confectioners’ sugar and beat until medium peaks form. Top the pie with whipped cream.
- Decorate with lime zest and lime slices. Store the pie in the refrigerator until ready to serve.
- Slice the pie into wedges, wiping your knife clean between slices, and serve cold.
Leave a Reply