
Introduction to Crispy Yaki Onigiri Recipe
What is Yaki Onigiri and Why You Should Try It?
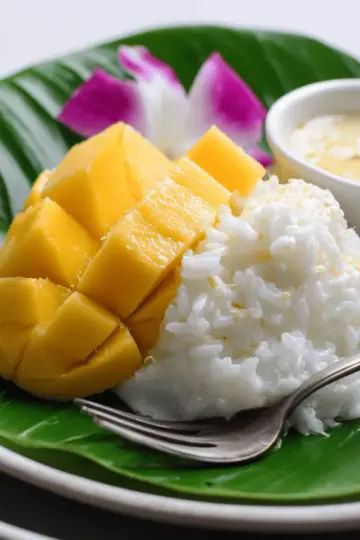
If you’re on the lookout for a delicious, portable snack, look no further than yaki onigiri! These grilled rice balls, originating from Japan, are transformed into delectable bites through their crispy exterior and savory fillings. Essentially, yaki onigiri are formed from sushi rice and can be stuffed with a variety of fillings, such as teriyaki salmon, chicken ham, or even savory vegetables.
What makes the crispy yaki onigiri recipe so appealing? First off, the contrast between the crunchy outside and fluffy inside is truly irresistible. Imagine biting into a perfectly grilled rice ball that has been seasoned to perfection—this dish delivers on taste and texture! Plus, cooking these rice balls adds an element of fun to your kitchen adventures.
You can enjoy them as a snack, alongside a homemade bento box, or even as a light meal. The best part? They are customizable, allowing you to explore different fillings and flavors based on what you have on hand. If you've never tried yaki onigiri before, today's your chance to impress your palate and bring a taste of Japan to your home!
Ingredients for Crispy Yaki Onigiri
Essential Ingredients for the Onigiri
To make your crispy yaki onigiri, you'll need a few key ingredients to ensure the perfect flavor and texture:
- 1 cup sushi rice: This Japanese short-grain rice is essential for achieving that sticky consistency.
- 1¼ cup water: The right amount of water is critical for properly cooking the rice.
- 2½ tablespoon soy sauce: Opt for tamari if you need a gluten-free option.
- 1 teaspoon potato starch: This secret ingredient helps create that irresistibly crispy exterior.
- 1 tablespoon avocado oil: A light, high smoke-point oil perfect for frying.
Teriyaki Salmon Filling Ingredients
For a burst of flavor, here's what you need for the delicious teriyaki salmon filling:
- 1 tablespoon soy sauce: Again, tamari works if you're avoiding gluten.
- ½ tablespoon honey: A touch of sweetness that balances the savory flavors.
- 1 teaspoon rice vinegar: This adds acidity and depth to the filling.
- ½ teaspoon sesame oil: It contributes a nutty aroma that enhances the salmon.
- 1 teaspoon garlic powder: A must for enhancing flavor!
- ⅛ teaspoon ground ginger: Adds warmth and a hint of spiciness.
With these simple ingredients, you’ll be well on your way to mastering the crispy yaki onigiri recipe! Treat yourself to this delightful dish that blends texture and umami flavors perfectly.
Step-by-Step Preparation of Crispy Yaki Onigiri
Making crispy yaki onigiri at home is easier than you might think! Follow these simple steps, and you'll have delicious, golden-brown rice balls that are perfect for snacking or sharing.
Rinse and Cook the Sushi Rice
Start by giving your sushi rice a good rinse. This step is essential; you want to wash away excess starch to achieve a perfect texture. Place your rice in a bowl and rinse it under cold running water until the water runs clear.
Next, add the rinsed rice to a rice cooker with 1¼ cups of water. If you’re looking for a quicker option, you can also use an Instant Pot—just cook on high pressure for 6 minutes and allow for a natural pressure release. While your rice is cooking, you can start preparing the teriyaki salmon filling.
Prepare the Teriyaki Salmon Filling
In a small bowl, combine the ingredients for the filling: 1 tablespoon of soy sauce, ½ tablespoon of honey, 1 teaspoon of rice vinegar, ½ teaspoon of sesame oil, 1 teaspoon of garlic powder, and just a pinch of ground ginger. These flavors will create a delicious, savory filling that contrasts beautifully with the crispy exterior.
Heat a skillet over medium-high heat and add 1 tablespoon of avocado oil. Once shimmering, place your salmon skin side down. After about 4 minutes, flip it over and cook until it's flaked and cooked through, which should take another 3-5 minutes. Once cooked, flake the salmon and mix it with the teriyaki sauce you prepared.
Shape the Onigiri
When your rice is cooked, stir in 2½ tablespoons of soy sauce until its color is uniform. Let it cool until it’s warm but manageable. Here’s where you can add your personal touch:
- By Hand: Wet your hands to prevent sticking, grab about ½ cup of rice, flatten it, and add 1 tablespoon of the salmon filling in the center. Encase the filling with rice and shape it into a triangle.
- If Using an Onigiri Mold: Wet the mold and fill the bottom with rice, add the filling, then top with more rice before pressing it tight.
Place your shaped onigiri on a plate lined with parchment paper.
Coat with Potato Starch
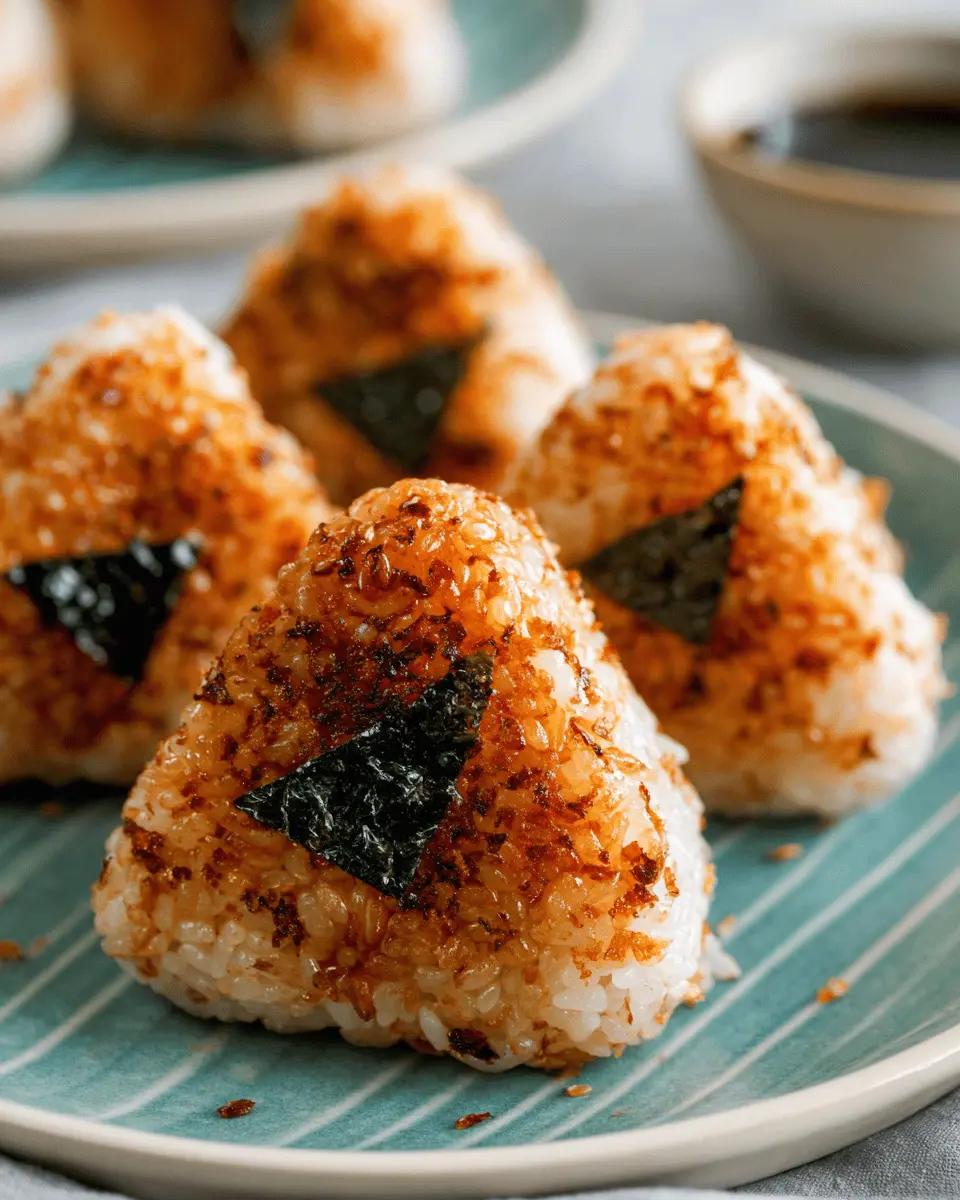
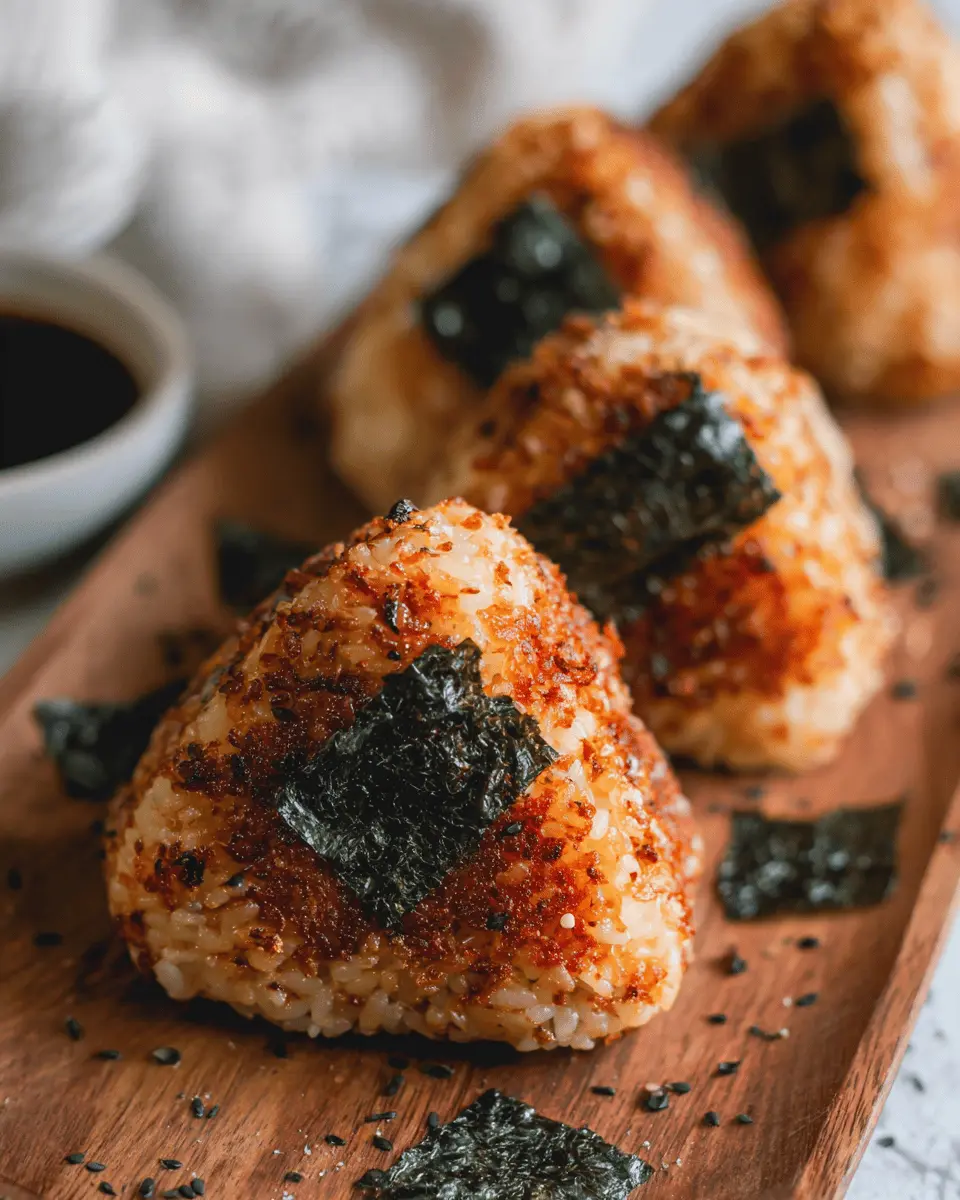
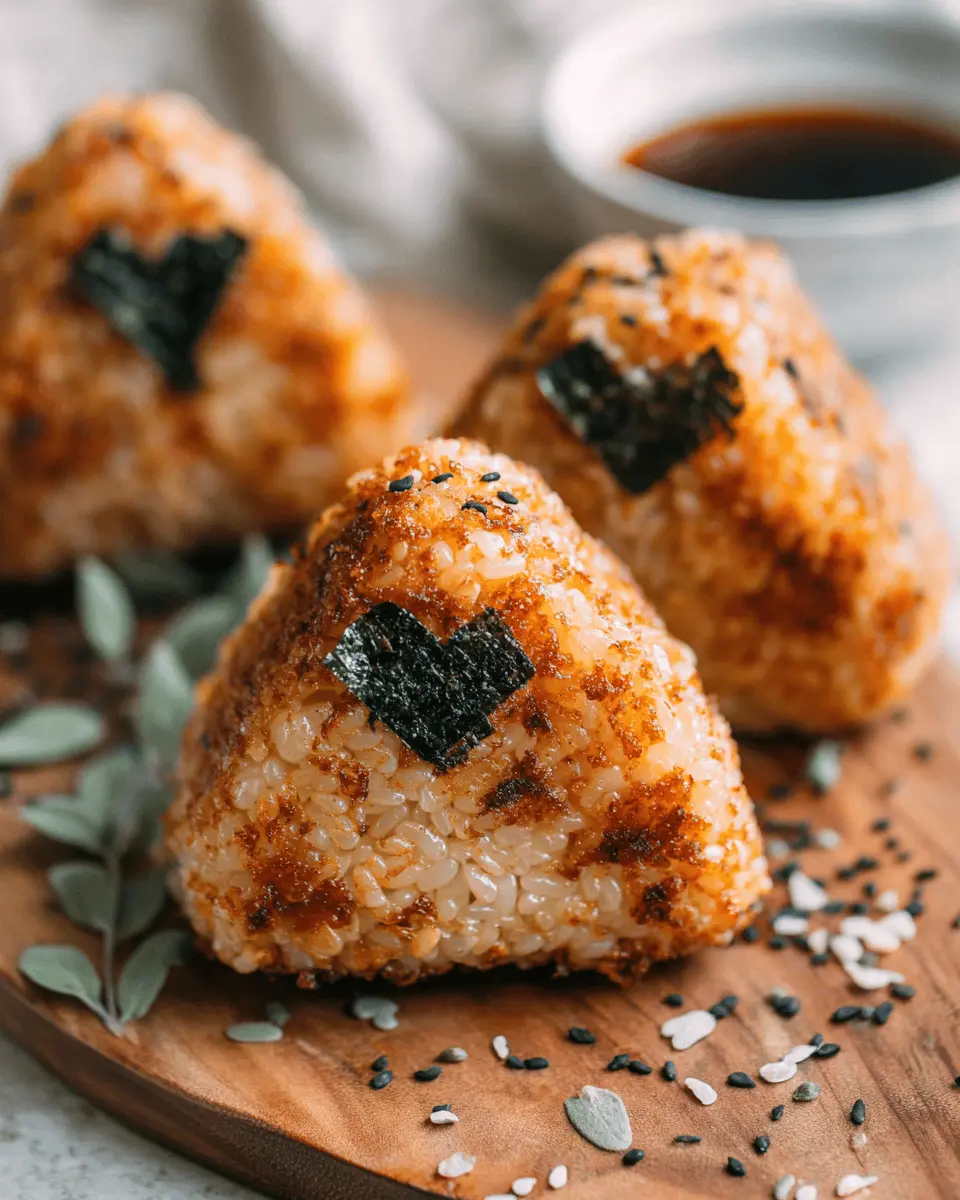
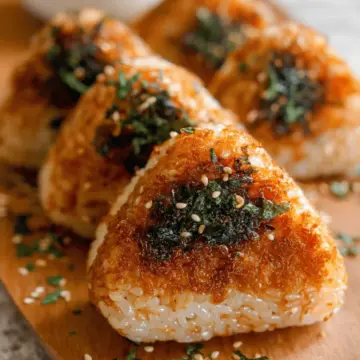
Generously sprinkle potato starch over both sides of your onigiri. This is crucial for achieving that coveted crispy texture! A strainer works wonders for even distribution, allowing for a perfectly crispy exterior while keeping the inside delectably tender.
Grill to Crispy Perfection
Heat a little more avocado oil in a skillet over medium heat. Once hot, add the onigiri and grill them for about 3-4 minutes on each side or until they're golden brown. The potato starch will create that wonderful crunch that makes these rice balls so delightful!
And there you have it! Your crispy yaki onigiri is ready to enjoy. Serve them with additional soy sauce or your favorite dipping sauce for a delightful treat. Happy cooking!
Variations on Crispy Yaki Onigiri
Vegetarian Yaki Onigiri Option
If you’re not in the mood for fish, try a vegetarian version that’s just as satisfying! Substitute the salmon with a mix of sautéed mushrooms, spinach, and a dash of soy sauce. This blend complements the crispy exterior beautifully while providing a rich umami flavor. For an extra protein boost, consider adding some cubed tofu to the filling. Just think of all those delightful flavors coming together in your homemade crispy yaki onigiri!
Spicy Tuna Yaki Onigiri
For those who crave a little kick, spicy tuna yaki onigiri is a must-try! Combine canned tuna with sriracha, mayonnaise, and a sprinkle of green onions for a delicious filling. The creamy texture of the tuna paired with a crispy shell creates a delightful contrast. Serve with extra sriracha on the side for dipping—perfect for a casual dinner or a fun lunch treat! Whatever variation you choose, these crispy yaki onigiri will surely elevate your meal.
Cooking Tips and Notes for Crispy Yaki Onigiri
Crafting the perfect crispy yaki onigiri is all about precision and a few key tricks! Here are some helpful tips to elevate your dish:
-
Potato Starch Advantage: Sprinkling potato starch creates that irresistible crispy exterior while keeping the rice fluffy inside. Don’t skip this step – it’s essential!
-
Rice Handling: Remember to keep your hands wet when shaping the rice. This simple tip prevents sticking and makes molding easier and more enjoyable.
-
Flavor Infusion: For a deeper flavor, season your rice with soy sauce before grilling, as it ensures every bite is deliciously seasoned.
-
Using a Mold: If you're a busy professional, consider investing in an onigiri mold. It simplifies the process, ensuring uniform shapes every time, which is especially handy for batch cooking.
By following these tips, you’ll master the art of making your crispy yaki onigiri like a pro!
Serving Suggestions for Crispy Yaki Onigiri
Perfect Pairings for Yaki Onigiri
Enjoy your crispy yaki onigiri with various delightful sides that enhance the experience. Consider pairing them with:
- Miso Soup: A warm bowl provides an umami-packed complement.
- Pickled Vegetables: Bright and tangy, they add a refreshing contrast.
- Seaweed Salad: A crunchy, flavorful side that complements the rice texture beautifully.
These pairings not only round out your meal but also introduce a variety of flavors and textures.
Creative Serving Ideas
Take your crispy yaki onigiri recipe to the next level by experimenting with presentation and flavor. Here are some fun ideas:
- Bento Box Arrangement: Pack the onigiri along with colorful veggies and a protein like teriyaki chicken or sautéed tofu.
- Dipping Sauce Trio: Serve with soy sauce, spicy mayo, and sesame dressing for a flavor adventure.
- Garnish with Herbs: Sprinkle fresh scallions or sesame seeds on top for an extra pop of color and taste.
By presenting your dishes creatively, you transform a simple meal into an elevated dining experience!
Time Breakdown for Crispy Yaki Onigiri
Preparation Time
The prep for this mouthwatering crispy yaki onigiri recipe takes about 30 minutes. This includes rinsing the sushi rice, cooking the salmon, and shaping your onigiri. It’s a fun process, especially if you enjoy bringing culinary creativity into your kitchen!
Cooking Time
Cooking time is roughly 20 minutes. This covers cooking the rice in a rice cooker or Instant Pot and sautéing the salmon. Pro tip: multitask by preparing the salmon while the rice is cooking for streamlined efficiency!
Total Time
In total, you’re looking at about 50 minutes from start to finish. This makes it a perfect choice for a weeknight meal or casual get-together with friends. With a little patience and care, you’ll have delicious, crispy onigiri ready to eat!
For more engaging recipe ideas, check out Japanese cooking basics, and dive into the delightful world of Japanese cuisine!
Nutritional Facts for Crispy Yaki Onigiri
When you dive into this crispy yaki onigiri recipe, it’s just as important to enjoy the flavors as it is to know the nutritional perks. Here's a quick breakdown of what you're getting per onigiri:
- Calories: 199 kcal
- Protein: 7 g
- Sodium: 600 mg
Perfect for a quick meal, these onigiri combine tasty components while still being mindful of your nutritional intake. With balanced protein and calorie amounts, they fit beautifully into a busy lifestyle. If you'd like to learn more about the health benefits of simple ingredients like sushi rice and salmon, check out this guide on cooking rice or explore healthy salmon recipes for meal inspiration!
FAQs about Crispy Yaki Onigiri
Can I make Yaki Onigiri in advance?
Absolutely! Crispy yaki onigiri can be prepared ahead of time, making them perfect for meal prep or a quick snack. Just shape and grill the onigiri, then let them cool before storing. For best results, enjoy them within three days.
What alternative fillings can I use?
Get creative with your fillings! Beyond the salmon filling, consider using ingredients like:
- Spicy tuna
- Grilled chicken or turkey bacon
- Cooked vegetables, such as sautéed mushrooms or spinach
- Cream cheese and chives
Experimenting with different flavors can make your crispy yaki onigiri recipe uniquely yours!
How do I store leftover Yaki Onigiri?
To keep your leftovers fresh, store them in an airtight container in the fridge. Ensure they cool completely before storing. If you want to reheat them later, grill or pan-fry them briefly to regain that delightful crispiness! Keeping these tips in mind will help you enjoy your delicious onigiri even longer.
Conclusion on Crispy Yaki Onigiri
Your journey with this crispy yaki onigiri recipe brings a delightful taste of Japan right to your home. These flavorful rice balls are not only fun to make but also perfect for on-the-go meals or a cozy dinner night. Enjoy experimenting with fillings and savor your creation!
Crispy Yaki Onigiri Recipe
Equipment
- rice cooker
- Skillet
- Mixing Bowl
- Measuring Cups
- Measuring Spoons
- Onigiri Mold
Ingredients
Main Ingredients
- 1 cup sushi rice Japanese short grain rice
- 1.25 cup water
- 2.5 tablespoon soy sauce or tamari sauce, for gluten free
- 1 teaspoon potato starch
- 1 tablespoon avocado oil plus more, if needed
Teriyaki Salmon Filling
- 1 tablespoon soy sauce or tamari sauce, for gluten free
- 0.5 tablespoon honey
- 1 teaspoon rice vinegar
- 0.5 teaspoon sesame oil
- 1 teaspoon garlic powder
- 0.125 teaspoon ground ginger
Instructions
Preparation Instructions
- Rinse rice under cold running water until the water runs clear.
- Add rice and water in a rice cooker and cook according to manufacturer's instructions. Alternatively, cook in the Instant Pot: Add water and rice to the Instant Pot liner and close the lid, ensuring the release valve is in the sealing position. Cook on high pressure for 6 minutes and naturally release pressure for 10 minutes once done.
- Combine salmon filling sauce ingredients (soy sauce, honey, rice vinegar, sesame oil, garlic powder, and ground ginger) in a small bowl and stir together.
- Heat avocado oil on a skillet over medium high heat until shimmering. Add salmon skin side down, sprinkle the top with salt, and cook for 4 minutes without moving. Flip and reduce heat to medium, pan fry until cooked through, about 3-5 minutes.
- Transfer the salmon to a bowl, discard the skin, add the sauce, and use a fork to flake and stir to combine.
- When the rice is done, add 2.5 tablespoon of soy sauce and mix well until uniform in color.
- Once the rice is cool enough to handle but still warm, shape the onigiri compactly.
- To shape by hand, wet hands to prevent sticking, grab about ½ cup of rice, flatten into a circle, add 1 tablespoon of salmon filling in the center, cover with rice and shape into a tight flattened triangle.
- Alternatively, using a mold, wet the inside of the mold, fill with ¼ cup of rice, add 1 tablespoon of salmon filling, cover with another ¼ cup of rice, close the mold tightly, and remove.
- Place the shaped onigiri on a parchment paper lined plate or wooden cutting board. Sprinkle the front and back with potato starch.


Leave a Reply