
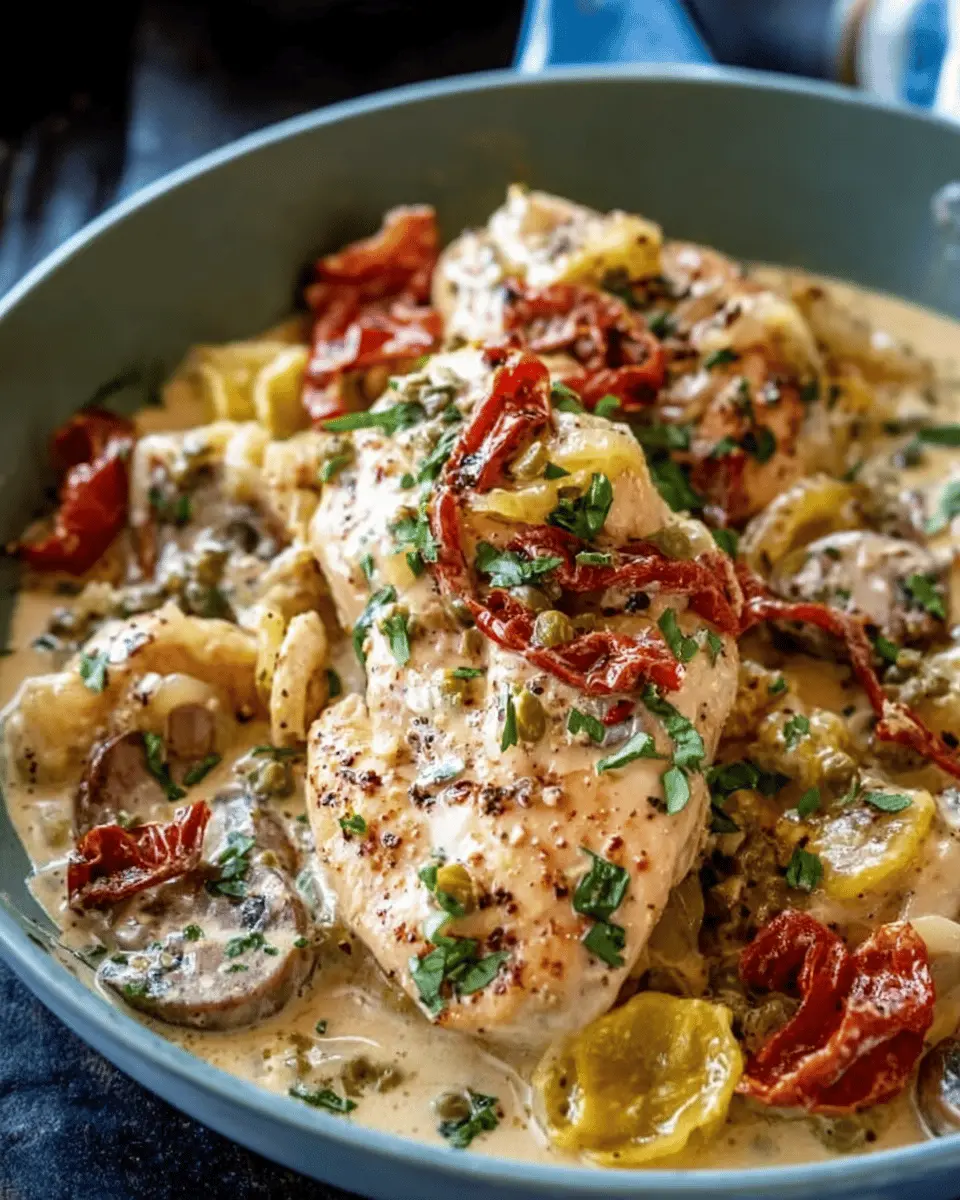
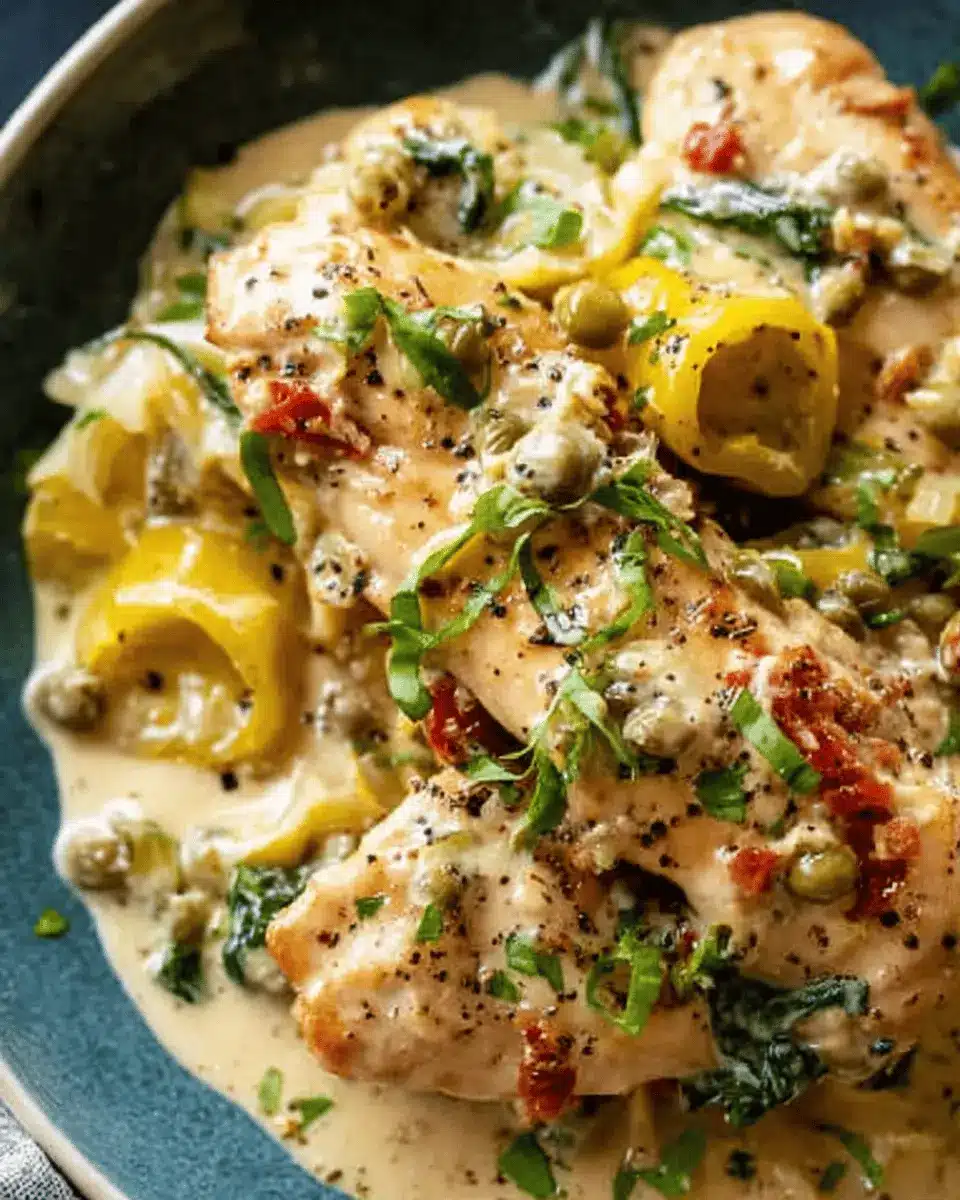
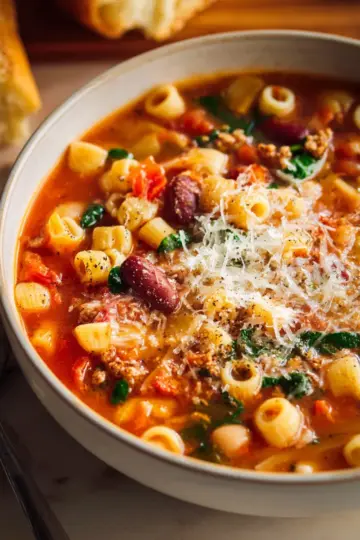
Introduction to Creamy Pepperoncini Chicken Skillet
If you’re in the mood for a savory, delicious meal that comes together in a flash, you’ll adore this Creamy Pepperoncini Chicken Skillet. This dish strikes an irresistible balance between tender chicken, zesty pepperoncini, and a luxuriously creamy sauce that complements the flavors perfectly. It's an excellent choice for busy weeknights or when you want to impress dinner guests without spending hours in the kitchen.
Why You’ll Love This Creamy Chicken Dish
One of the best reasons to fall in love with this recipe is its versatility. You can serve it over pasta, rice, or fresh vegetables, making it adaptable to your eating preferences. Not to mention, the quick cooking process — popping everything into a skillet means minimal cleanup!
Additionally, the pepperoncini adds a delightful tang that cuts through the richness of the cream, providing a burst of flavor with every bite. If you’re a fan of dishes that are effortlessly satisfying yet full of character, this creamy chicken creation is sure to become a regular in your meal rotation. With ingredients you probably have on hand and a method that’s straightforward, let’s dive into how to whip this dish up in no time!
Essential Items You Need to Make This Dish
Creating a Creamy Pepperoncini Chicken Skillet isn't just about tossing ingredients together; it's about bringing together a handful of essential components to create something truly delicious. Here’s what you'll need:
- Butter: The cooking fat of choice, adding a rich flavor and helping to brown the chicken beautifully.
- Chicken: Opt for boneless, skinless pieces cut into thin strips for quick cooking. Chicken thighs or breasts work wonderfully!
- Sea Salt and Ground Pepper: These staples enhance the flavor of your dish. Don't skimp on seasoning.
- White Onion and Garlic: Sauté these aromatics to create a fragrant base for your skillet.
- Chicken Stock: A flavorful liquid to deglaze the pan and enrich the sauce.
- Heavy Cream and Parmesan Cheese: The stars of the show! They create a luscious, creamy sauce.
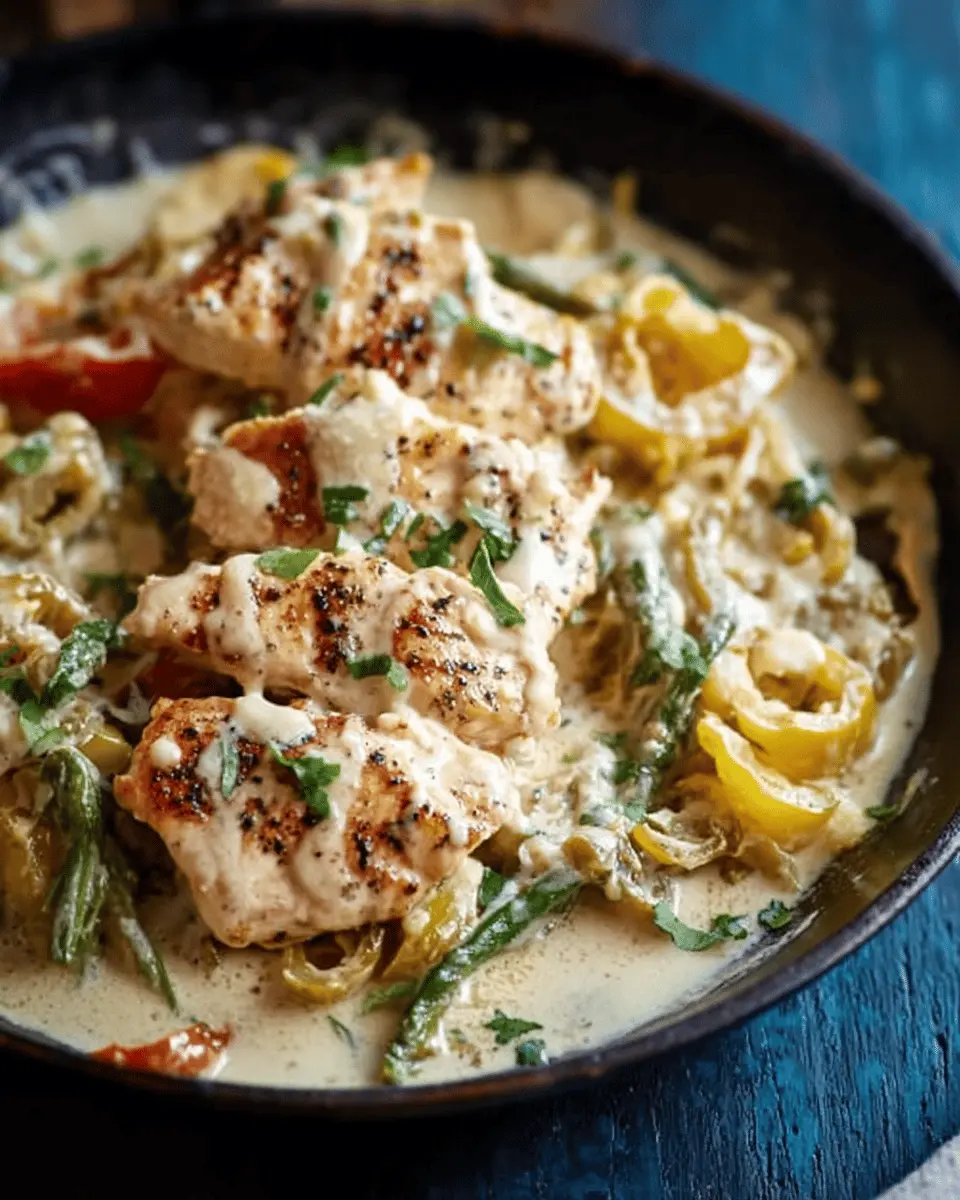
- Roasted Red Peppers and Pepperoncini Peppers: Bring texture and tang. These add a delightful zing to your meal.
- Italian Seasoning: A blend that ties all flavors together, giving it that special Italian touch.
With these ingredients, you’re all set to create a comforting meal that feels gourmet but is simple enough for a weeknight dinner. Ready to dive in?
Step-by-step Preparation for Creamy Pepperoncini Chicken Skillet
Creating your delicious Creamy Pepperoncini Chicken Skillet doesn’t have to be complicated. Let’s walk through this simple yet flavorful recipe step by step.
Melt the butter and season the chicken
Start your culinary adventure by melting 2 tablespoons of butter in a large, heavy pan over medium-high heat. The aroma of melting butter is delightful, isn’t it? While the butter melts, season 2 pounds of chicken, cut into thin strips, with 1 teaspoon of sea salt and 1 teaspoon of ground pepper. This will give your chicken a wonderful base flavor.
Brown the chicken on all sides
Once your butter is sizzling, it’s time to add the seasoned chicken to the pan. Allow it to cook, turning every couple of minutes until all sides are beautifully browned, which should take about 8 minutes total. The golden crust adds depth to the flavor, creating that irresistible taste we all love. Remember, the chicken won’t need to be fully cooked yet; we’ll take care of that later!
Sauté garlic and onions until fragrant
Next, remove the chicken from the pan and set it aside. In the same pan, add 1 diced white onion and 2 tablespoons of diced garlic. Sauté these until they are fragrant and the onion is translucent, which should take about 5 minutes. This stage is when the kitchen really begins to smell divine!
Combine chicken stock and roasted red peppers
Now it’s time to bring in some liquid goodness. Pour in ½ cup of chicken stock along with ½ cup of drained and sliced roasted red peppers. Let this mixture reduce by half for about 5 more minutes. It helps concentrate those flavors, ensuring every bite of your Creamy Pepperoncini Chicken Skillet is packed with deliciousness.
Incorporate cream and parmesan, then add seasonings
Once your stock and pepper mixture has reduced, it’s time to lighten it up. Slowly stir in 1 cup of heavy cream and ½ cup of shredded parmesan cheese, whisking vigorously as you pour. The cream and parmesan add a rich, velvety texture to the sauce. After this, sprinkle in 1 tablespoon of Italian seasoning and adjust seasonings to taste.
Simmer until chicken is cooked through
Return the chicken to the pan along with ½ cup of sliced pepperoncini peppers. Let everything simmer until the chicken reaches an internal temperature of 165°F. This should take an additional few minutes. If the sauce is too thick, don’t hesitate to add a bit more chicken stock to achieve your desired consistency.
Finally, serve your Creamy Pepperoncini Chicken Skillet over rice, pasta, or veggies for a complete meal that is sure to impress. Enjoy the blend of creamy and tangy flavors—your taste buds will thank you!
Variations on Creamy Pepperoncini Chicken Skillet
Spicy Variation with Extra Pepperoncini
If you crave that added kick, simply toss in more pepperoncini into your Creamy Pepperoncini Chicken Skillet. Consider using sliced, diced, or even whole peppers for more vibrant flavor. Add in some crushed red pepper flakes or a dash of hot sauce to really turn up the heat! Not only does this variation pack a spicier punch, but it also enhances the dish's tangy and savory notes, making it a delightful departure from the standard recipe.
Vegetables to Enhance Nutrition
Boost the nutrition of your creamy skillet by incorporating colorful veggies! Try adding spinach, zucchini, or bell peppers sautéed alongside the onion and garlic — they'll soak up the delicious flavors while escalating fiber and vitamins. An extra bump in colors not only makes your dish visually appealing but ensures a well-rounded meal that’s both nutritious and satisfying. Don't hesitate to get creative; vegetables can transform your Creamy Pepperoncini Chicken Skillet into a wholesome feast!
Cooking Tips and Notes for Creamy Pepperoncini Chicken Skillet
Tips for Browning Chicken Perfectly
Achieving that golden-browned crust on your chicken in the Creamy Pepperoncini Chicken Skillet is essential for flavor. Start with a hot pan and ensure your chicken pieces are patted dry for even browning. Don’t overcrowd the pan; allow space for steam to escape. Turn the chicken only when it's ready to release from the pan—this will help form that beautiful crust.
Notes on Selecting Chicken and Cream
When choosing chicken, opt for fresh, high-quality meat. Look for chicken that is plump and has a bright color. For the cream, heavy cream is preferred for its richness and ability to create a luxurious sauce. Brands like Dairy Pure provide excellent options you can rely on to elevate your dish.
Serving Suggestions for Creamy Pepperoncini Chicken Skillet
Best sides to pair with the chicken
For a delightful meal experience, consider pairing your Creamy Pepperoncini Chicken Skillet with:
- Garlic Mashed Potatoes: The buttery, creamy texture complements the sauce splendidly.
- Steamed Broccoli or Green Beans: Their crispness and bright color add freshness to the dish.
- Rice or Quinoa: These grains soak up the rich sauce perfectly, making every bite enjoyable.
- Rustic Bread: Perfect for sopping up that decadent cream sauce.
Creative serving ideas for meal prep
If you’re preparing meals for the week, try these options:
- Bowl It Up: Layer the Creamy Pepperoncini Chicken Skillet over a bed of greens, quinoa, or roasted vegetables.
- Wrap It: Use tortillas to create hearty wraps filled with chicken and your favorite veggies.
- Family Style: Serve it in a large dish with sides, allowing everyone to help themselves for a cozy, shared experience.
With these suggestions, you'll have a versatile dining experience that makes your meal planning easier and more delicious!
Time Breakdown for Creamy Pepperoncini Chicken Skillet
Preparation time
Getting your ingredients ready only takes about 10 minutes. Quickly dice the onion and garlic, slice your roasted red peppers, and cut the chicken into strips. It's a breeze!
Cooking time
The actual cooking process will take approximately 20 minutes. This part involves browning the chicken, sautéing your aromatics, and creating that mouthwatering creamy sauce.
Total time
In just 30 minutes, you’ll have a delicious Creamy Pepperoncini Chicken Skillet ready to serve! That’s perfect for a weeknight meal or an easy dinner to impress guests. Don’t forget to grab some pasta or rice to go with it!
Nutritional Facts for Creamy Pepperoncini Chicken Skillet
When you whip up this Creamy Pepperoncini Chicken Skillet, you're not just treating your taste buds—you're also packing in a variety of nutrients. Here's a quick rundown of the key nutritional facts:
Calories
- 565 calories per serving ensure this dish is both satisfying and hearty.
Protein
- With 41 grams of protein, this meal is fantastic for muscle repair and keeps you feeling full throughout the day.
Sodium
- At 813 milligrams of sodium, it’s essential to balance this dish with fresh veggies or a light salad for a heart-healthy meal.
Enjoy this delicious recipe guilt-free by tailoring portion sizes to your dietary needs! For more food tips and healthy eating guidelines, check out resources like the American Heart Association or EatingWell.
FAQs about Creamy Pepperoncini Chicken Skillet
Can this dish be made ahead of time?
Absolutely! The Creamy Pepperoncini Chicken Skillet can be prepped and cooked ahead of time. Just follow the recipe, allow it to cool, then store it in an airtight container in your refrigerator. It stays delicious for up to three days. Simply reheat on the stove or in the microwave when you're ready to enjoy it!
What alternatives can I use for heavy cream?
If you’re looking for a lighter option or need a dairy-free alternative, consider using coconut milk or unsweetened almond milk thickened with a bit of cornstarch. For a healthier option, Greek yogurt can also work wonders, providing creaminess without too many calories.
How can I make the dish less spicy?
To tone down the heat from the pepperoncini peppers, you can start by using fewer peppers or opt for mild varieties. Additionally, adding a touch of sugar or extra cream can help balance the flavors and reduce the overall spiciness. Remember, a little bit of spice can enhance flavor, so adjust gradually to suit your taste!
Conclusion on Creamy Pepperoncini Chicken Skillet
To wrap things up, the Creamy Pepperoncini Chicken Skillet is a delicious choice for a quick weeknight dinner that the whole family will love. It’s creamy, tangy, and packed with flavor. Pair it with your favorite pasta, rice, or veggies for a satisfying meal that hits the spot. Enjoy!

Creamy Pepperoncini Chicken Skillet
Equipment
- large heavy pan
Ingredients
- 2 tablespoon butter
- 2 lbs chicken cut into thin strips
- 1 teaspoon sea salt
- 1 teaspoon ground pepper
- 1 white onion diced
- 2 tablespoon garlic diced
- ½ cup chicken stock
- ½ cup roasted red pepper drained and sliced
- 1 cup heavy cream
- ½ cup parmesan cheese shredded
- 1 tablespoon Italian seasoning
- ½ cup pepperoncini peppers drained
Instructions
- In a large, heavy pan, melt butter on medium high heat.
- Season chicken with salt and pepper, add to pan.
- Brown chicken on all sides, turning every couple minutes – about 8 minutes total.
- Remove chicken from pan (chicken might not be fully to 165 degrees internal temperature, which is fine).
- Add garlic and onion to pan, let brown, about 5 minutes.
- Add stock and roasted red peppers and let reduce to half, another 5 minutes.
- Turn heat off, and slowly stir in cream and parmesan, whisking vigorously as you add cream.
- Slowly bring heat back to medium high, add Italian seasoning, pepperoncinis, and chicken back to pan.
- Let sauce reduce to half and bring chicken fully to 165 fahrenheit internal temperature. Add more stock if needed to thin sauce as chicken cooks.
- Remove from heat and serve over vegetables, pasta, rice, or on its own!


Leave a Reply