
Introduction to Cheese Straws
Are you searching for a delectable snack that’s simple to prepare and utterly irresistible? Look no further than cheese straws! These delightful bites are not only mouthwatering but provide a perfect balance of flavors and textures that will keep you coming back for more.
Why Homemade Cheese Straws Are the Best Snack Option?
Homemade cheese straws elevate any gathering, from casual get-togethers to elegant soirées. There's something incredibly satisfying about crafting your own snacks, and these straws are a shining example of kitchen creativity. The combination of flaky pastry, rich cheddar, and just the right amount of seasoning makes these straws a crowd favorite.
When you make cheese straws from scratch, you have full control over the ingredients. This means you can choose high-quality cheese, experiment with spices, or even make them gluten-free if that’s your preference. Plus, they’re incredibly easy to whip up! Just roll, cut, and bake.
Many people don’t realize that cheese straws can also be tailored to fit your specific tastes. Want a hint of smokiness? Add some smoked paprika. Like a bit of heat? Toss in some cayenne pepper. The possibilities are endless! So gather your friends, indulge in these tasty snacks, and enjoy a moment of homemade bliss. For more cheese inspiration, check out The Cheese Board's blog for additional recipes and ideas.
Ingredients for Cheese Straws
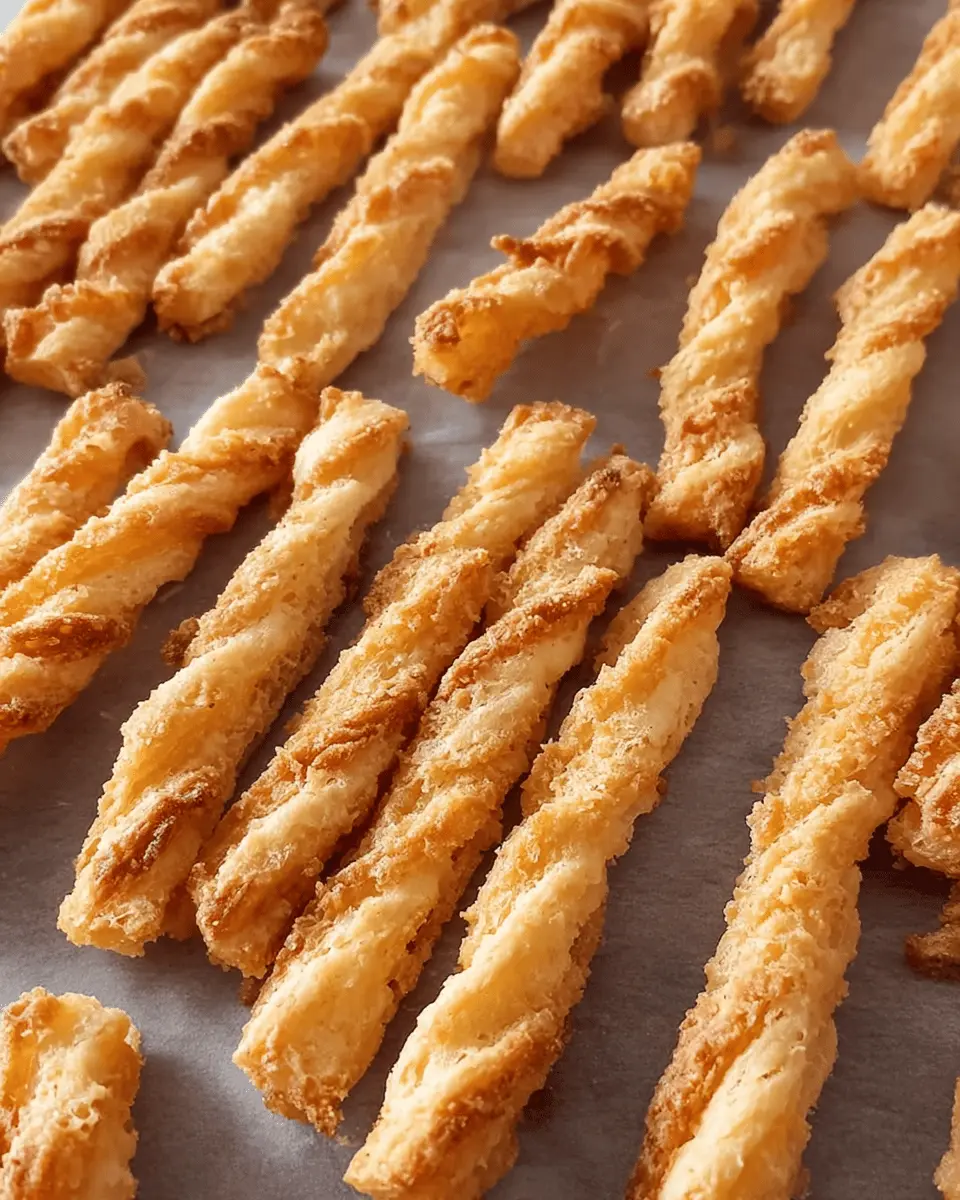
Essential ingredients for making cheese straws
To whip up a delicious batch of cheese straws, you'll need just a few simple ingredients that come together beautifully. Here’s what you’ll want to gather:
- Sharp Cheddar Cheese: The star ingredient! Choose a good quality aged cheddar for robust flavor.
- All-Purpose Flour: This gives the straws their structure.
- Butter: Unsalted butter is ideal, contributing richness and flakiness.
- Mustard Powder: A touch of zest! This adds a wonderful depth of flavor.
- Salt: Enhances all the other flavors in the mix.
- Cayenne Pepper: Just a pinch for some heat; adjust to your taste!
- Water: Helps bind the ingredients together.
Options for ingredient variations
Feeling a little adventurous? You can customize your cheese straws with these fun variations:
- Different Cheeses: Experiment with Monterey Jack or Gruyère for unique flavors.
- Herbs and Spices: Fresh herbs like rosemary or thyme can elevate the taste.
- Spicy Kick: Add chopped jalapeños or pepper jack cheese if you love heat!
- Seeds or Nuts: Poppy seeds or walnuts might add a lovely crunch.
By mixing and matching these ingredients, you can create a version of cheese straws tailored just for you!
Preparing Cheese Straws
Making cheese straws is an absolute delight! Who wouldn’t want to whip up a snack that’s not only delicious but also impressively easy to prepare? Let’s break down the steps so you can create the perfect cheese straws for your next gathering or cozy night in.
Gather all your ingredients
First things first, it’s time to gather everything you need. For delicious cheese straws, ensure you have:
- 1 cup grated sharp cheddar cheese
- 1 cup all-purpose flour
- ½ cup unsalted butter, softened
- 1 teaspoon cayenne pepper (adjust to taste)
- ½ teaspoon paprika
- Salt (to taste)
- 1 egg, beaten (for egg wash)
Having your ingredients ready not only makes the process smoother but also allows you to double-check that you have everything on hand. Plus, who doesn’t enjoy a well-organized kitchen?
Preheat your oven
While you’re prepping your ingredients, go ahead and preheat your oven to 400°F (200°C). A hot oven is essential for achieving those perfectly golden and crisp cheese straws. If you're wondering about optimal baking times, there are plenty of baking resources available that detail how oven heat affects various recipes!
Combine the dry ingredients
In a large bowl, mix together the flour, cayenne pepper, paprika, and a pinch of salt. This combination will give your cheese straws their tasty kick. Whisk the ingredients to ensure they are evenly distributed—this small step can make the difference in flavor later on!
Mix in the cheese and butter
Next, add the grated cheddar cheese and softened butter to the dry ingredients. Using your fingers, mix them together until the mixture resembles coarse crumbs. It may be tempting to use an electric mixer, but mixing by hand will give you more control over the dough’s texture. If you’re looking for cheese recommendations, experts often suggest using sharper cheeses for a bolder flavor.
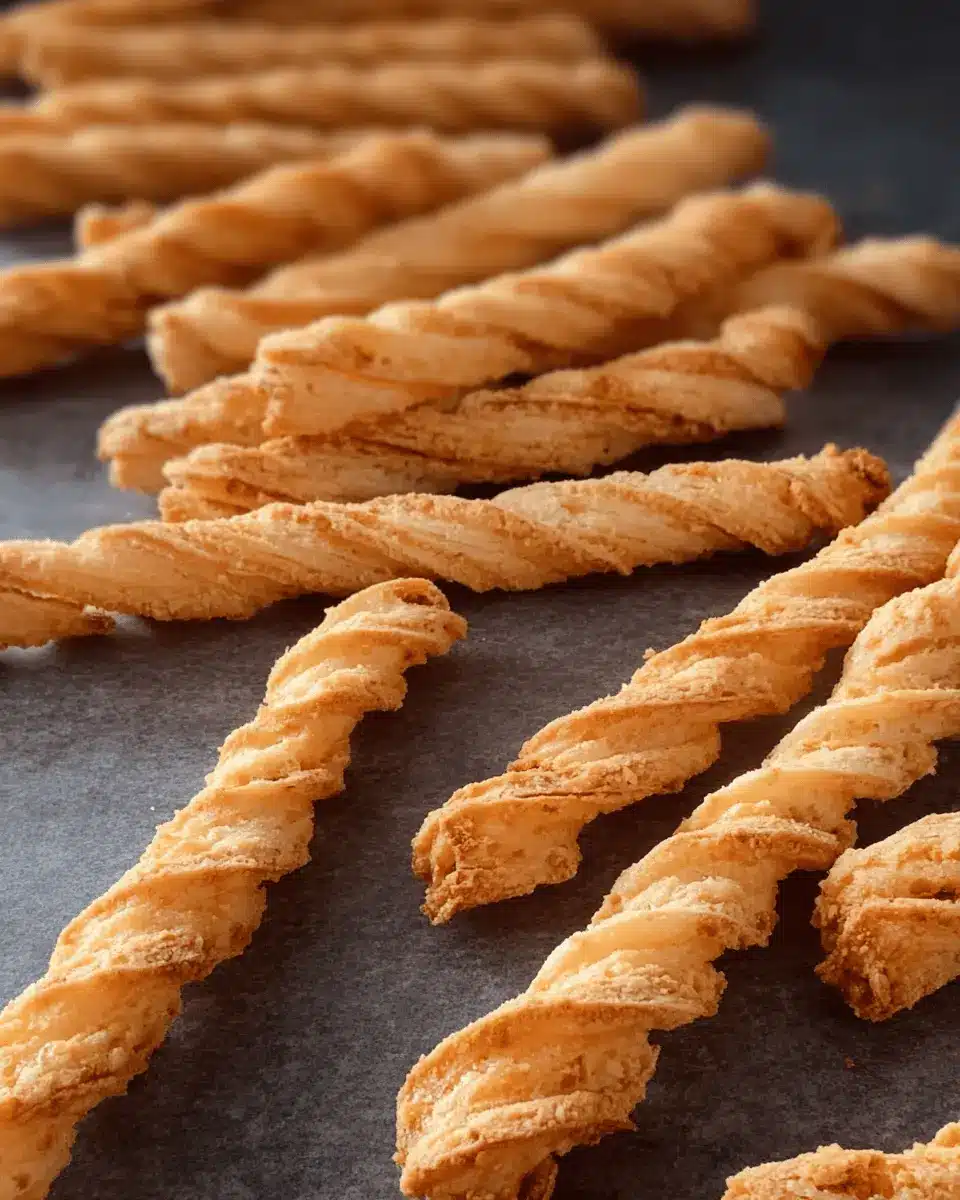
Roll out the dough and cut into strips
Once your dough is mixed, transfer it onto a lightly floured surface. Roll it out to about ¼ inch thick. Then, using a knife or a pizza cutter, cut the dough into strips or fun shapes. This is where you can get creative! The shape doesn’t have to be perfect; a bit of rustic charm adds character to your cheese straws.
Bake until golden and crispy
Finally, place your strips on a baking sheet lined with parchment paper. Brush them with the beaten egg for that beautiful sheen, and pop them into the preheated oven! Bake for about 12 to 15 minutes, or until they are golden and crispy. Keep an eye on them, as oven times can vary significantly.
And there you have it—now you’re all set to enjoy your delicious cheese straws! You can even experiment with different cheeses or spices next time. Happy baking!
Variations on Cheese Straws
Adding spices for an extra kick
If you’re aiming to tantalize taste buds, consider adding spices to your cheese straws. A dash of cayenne pepper introduces a delightful heat, while smoked paprika lends a subtle smokiness. If you’re a garlic lover, try garlic powder or fresh minced garlic for that aromatic touch. Experimenting with Italian seasoning or a little za’atar can also elevate the flavor profile, making your cheese straws the star of any gathering.
Using different types of cheese for flavor
While cheddar is a classic choice, don't limit yourself! Experiment with combinations like sharp Gruyère, tangy feta, or creamy goat cheese to bring something special to your cheese straws. Each cheese imparts its unique flavor, creating a variety of textures and tastes. You might even blend cheeses for a more complex profile—just think about the endless possibilities! For further inspiration, check out Bon Appétit or Serious Eats for cheese pairings that can elevate your snack game!
Cooking Tips and Notes for Cheese Straws
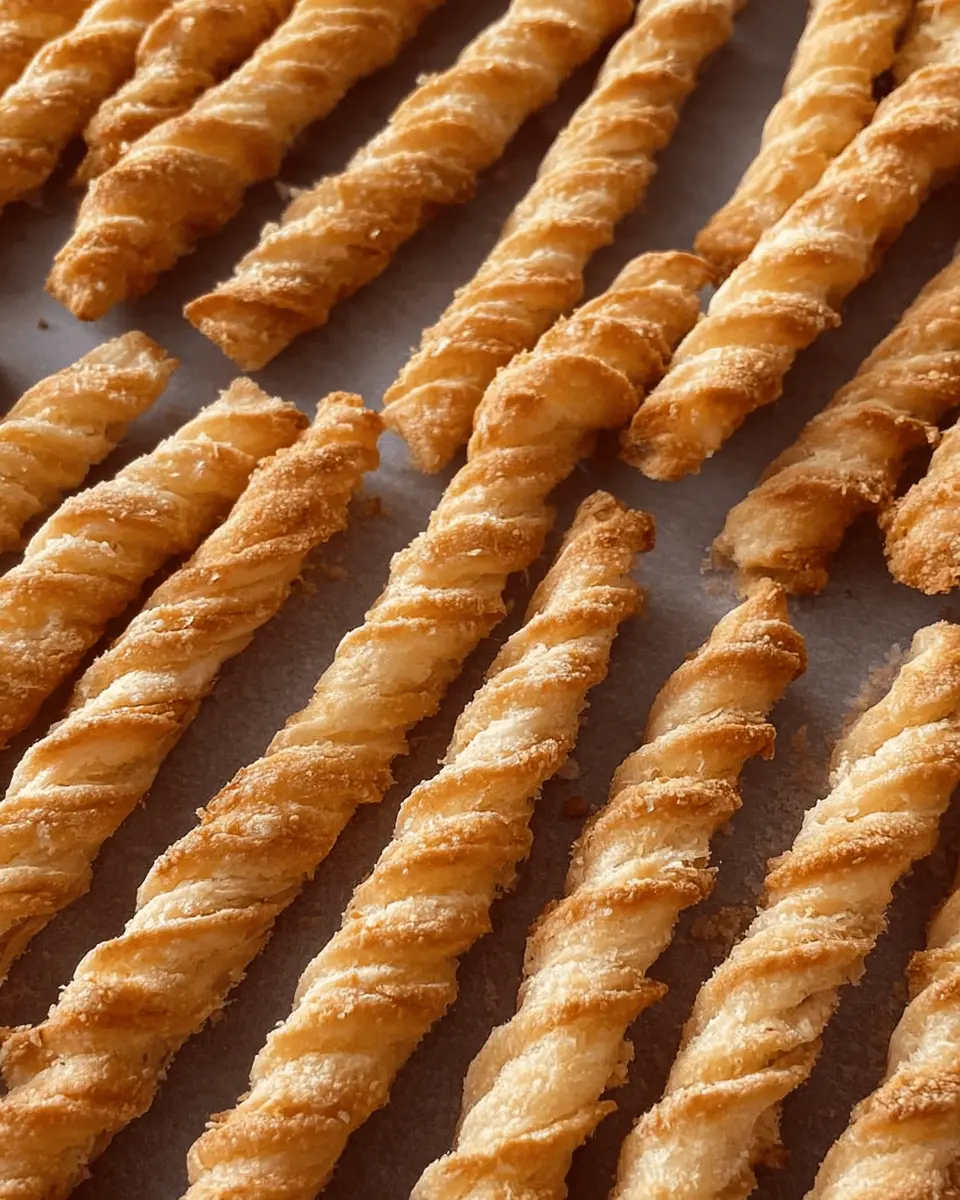
Tips for achieving the perfect texture
To get those crispy and flaky cheese straws, choose a combination of both sharp and mild cheddar. This will enhance the flavor while keeping the texture balanced. Make sure your butter is cold when mixing in, as this helps create those delightful flaky layers. Roll your dough to a consistent thickness—roughly ⅛ inch—before cutting. This ensures even baking and a uniform texture that won't leave some straws undercooked while others become too crisp.
Common mistakes to avoid when making cheese straws
One common pitfall when making cheese straws is overworking the dough; this can lead to a tough texture. Instead, blend just until combined. Also, be careful not to overcrowd the baking sheet; give each straw space to expand and cook evenly. Lastly, remember to keep an eye on them while baking; the golden brown color is your indicator that they’re ready, and a minute too long can lead to an undesired crunch!
For more tips on baking, check out King Arthur Baking. Happy baking!
Serving Suggestions for Cheese Straws
Pairing Cheese Straws with Dips
Whether you're hosting a gathering or just enjoying a cozy night in, cheese straws are a fantastic snack on their own. However, dipping them in your favorite sauces elevates the experience! Consider serving them with:
- Creamy Spinach Dip: The richness complements the cheese straws nicely.
- Spicy Mustard: Adds a zesty kick that pairs wonderfully.
- Hummus: A healthy, flavorful option that balances the savory flavors of the cheese.
Discover more dip options on sites like Food Network to suit your taste!
Creative Serving Ideas for Parties
Show off your cheese straws with these fun serving ideas that will impress your guests:
- Charcuterie Board: Arrange the cheese straws alongside meats, olives, and fruits for a delightful spread.
- Mini Appetizer Cups: Serve cheese straws in small cups filled with a dip to create an engaging presentation.
- Festive Skewers: Skewer cheese straws with cherry tomatoes or basil for an elegant touch.
These creative ideas not only make your presentation pop but also encourage mingling and sharing, perfect for enhancing the atmosphere of any gathering!
Time Breakdown for Cheese Straws
Preparation Time
Getting your cheese straws ready is a breeze with just 15 minutes of prep. Gather your ingredients, whip them together, and you're almost there!
Baking Time
The magic happens in the oven! You'll need about 20 minutes to bake your cheese straws until they're golden brown and irresistibly crispy.
Total Time
In just 35 minutes, from start to finish, you'll have a batch of delightful cheese straws ready to impress your friends or family. Quick, tasty, and utterly satisfying!
For more detailed cheese straw recipes, check out sources like Serious Eats for expert insights and variations. What’s your ideal dip for them?
Nutritional Facts for Cheese Straws
Calories per serving
A single serving of cheese straws typically contains around 150 calories. This makes them a delightful snack or appetizer without completely derailing your healthier eating goals.
Key nutritional components
Cheese straws are packed with flavor while providing essential nutrients. Here are some key dietary highlights:
- Total Fat: 9g (with 5g being saturated fat)
- Protein: 4g
- Carbohydrates: 14g
- Calcium: A good source, helping to strengthen bones
- Sodium: Around 300mg, so enjoy in moderation!
When you're whipping up these delicious cheese straws, remember: not only are they a tasty treat, but they can be enjoyed in a balanced diet. For more insights on healthy snacking, check out resources from the American Heart Association.
FAQs about Cheese Straws
How do I store leftover cheese straws?
To keep your cheese straws fresh, store them in an airtight container at room temperature. They’re best enjoyed within a day or two, but if you have more leftovers, you can refrigerate them for up to a week. Just make sure to separate layers with parchment paper to prevent sticking.
Can I freeze cheese straws for later use?
Absolutely! Freezing cheese straws is a fantastic option. After they’ve cooled completely, place them in a freezer-safe bag or container. They can last up to three months in the freezer. When you're ready to enjoy them again, just pop them in the oven for a few minutes to crisp them up!
What can I pair cheese straws with?
Cheese straws make versatile snacks! You can pair them with a variety of dips, like hummus, guacamole, or a zesty salsa for added flavor. They also pair beautifully with soups and salads, making them a delightful addition to any meal. If you’re hosting a gathering, serve them alongside olives or charcuterie boards for a touch of sophistication. Check out more pairing ideas at Cheese.com.
By addressing these common questions, you can maximize your enjoyment of cheese straws—whether you’re making a batch for a party or just treating yourself!
Conclusion on Cheese Straws
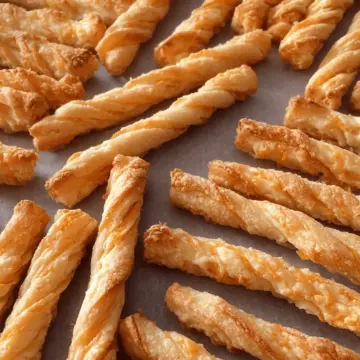
Homemade cheese straws are a delightful and easy-to-make snack that elevate any gathering. Their crisp, cheesy goodness pairs perfectly with various dips or wines, making them a versatile option. Try this recipe and enjoy the satisfaction of creating a snack that your guests will love!
Cheese Straws: Easy and Indulgent Snack with Turkey Bacon Twist
Equipment
- Skillet
- 9x13-Inch Baking Dish
- oven
Ingredients
Filling
- 2 tablespoons butter
- 2 tablespoons minced green onion
- 1 cup cooked crabmeat, finely chopped
- ½ cup dry bread crumbs
- ¼ cup shredded Monterey Jack cheese
- 1 large egg, beaten
- 1 teaspoon lemon juice
- ½ teaspoon dried dill weed
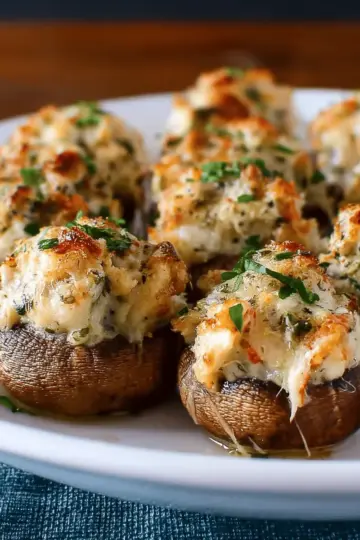
Mushrooms
- 1 ½ pounds fresh button mushrooms, stems removed
- ½ cup shredded Monterey Jack cheese
- ¼ cup dry white wine
- ½ cup butter, melted
Instructions
Cooking Directions
- Preheat oven to 400 degrees F (200 degrees C).
- Melt 2 tablespoons butter in a skillet; cook and stir green onion until softened, about 2 minutes. Transfer green onion to a bowl. Stir in crabmeat, bread crumbs, ¼ cup Monterey Jack cheese, egg, lemon juice, and dill weed until well mixed.
- Pour ½ cup melted butter in a 9x13-inch baking dish; turn mushroom caps in butter to coat. Fill mushroom caps with the crab mixture and sprinkle with remaining ½ cup Monterey Jack cheese. Pour white wine into baking dish.
- Bake in preheated oven until cheese is melted and lightly brown, 15 to 20 minutes.
Leave a Reply