
Introduction to Japanese Katsu Bowls
The allure of homemade Japanese Katsu Bowls
Food has a magical way of whisking us away to different places, and nothing does that quite like Japanese Katsu Bowls. Originating from traditional Japanese cuisine, these bowls combine crispy, breaded meat with fluffy rice and a savory sauce, making them a comforting staple. When you take the time to whip up a batch at home, you not only enjoy a delicious meal but also the satisfaction of creating something truly special.
Imagine biting into that perfectly fried cutlet, the crunch giving way to tender, juicy meat inside. Drizzle it with tangy tonkatsu sauce, and you’ve got a bite that is both savory and a hint of sweet. Each component works in harmony, transforming simple ingredients into an extraordinary culinary experience.
Making Japanese Katsu Bowls at home lets you customize the recipe to your tastes—add your favorite veggies or adjust the sauce’s sweetness. Plus, it's an excellent opportunity to unwind after a busy day or impress friends at your next dinner party. If you’re curious to learn how to create this delightful dish, follow along as we guide you through an easy and enjoyable recipe.
Ready to dive into a bowl of goodness? Let’s get started!
Ingredients for Japanese Katsu Bowls
Creating a delicious Japanese katsu bowl starts with high-quality ingredients that bring out the rich flavors and textures. Let's dive into the essentials you'll need.
Main Ingredients for Katsu
- Proteins: Choose between 2 boneless chicken breasts or pork loin cutlets. Pounding them to ½-inch thickness ensures they cook evenly and absorb the flavors.
- Breadcrumb Coating: Panko breadcrumbs are key for that signature crunch! They’re lighter and crispier than traditional breadcrumbs.
- Binders: You’ll need all-purpose flour and beaten eggs to create a three-step breading process that locks in the moisture.
- Rice: Serve your katsu over 3 cups of cooked white rice, preferably sushi rice for its sticky texture that pairs perfectly with the toppings.
Tonkatsu Sauce Ingredients
If you want to whip up some homemade tonkatsu sauce, gather:
- 3 tablespoon ketchup
- 2 tablespoon Worcestershire sauce
- 1 tablespoon soy sauce
- 1 teaspoon sugar
This sauce adds a sweet and tangy kick to your bowl, enhancing the flavor of the katsu. For more tips on rice types, check out this guide on sushi rice to perfect your dish!
Now you're all set to create your Japanese katsu bowls!
Preparing Japanese Katsu Bowls
Creating delicious Japanese Katsu Bowls at home is not only rewarding but also surprisingly simple! Let’s break it down step-by-step so you can impress your friends, family, or even just treat yourself to a fantastic meal.
Step 1: Preparing the protein
Start by selecting your protein. You can use either chicken breasts or beef cutlets. If you choose chicken, pound the breasts to a uniform ½-inch thickness. This not only helps them cook evenly but also ensures tenderness. Season the cutlets generously with salt and pepper on both sides. This basic step enhances the flavor of your katsu and sets the stage for a mouthwatering dish.
Step 2: Setting up the breading station
Next, set up your breading station. Use three separate bowls:
- First Bowl: ½ cup of all-purpose flour
- Second Bowl: 2 large eggs, beaten
- Third Bowl: 1 cup of panko breadcrumbs
Having everything organized will streamline the breading process and keep your workspace tidy. While panko breadcrumbs are essential for that satisfying crunch, feel free to explore different types of flour for added flavor—like rice flour or cornstarch.
Step 3: Breading the cutlets
Now, it's time to coat your protein! Start by dredging each cutlet in the flour, shaking off any excess. Then, dip it into the beaten eggs, allowing any surplus to drip back into the bowl. Finally, press the cutlet into the panko breadcrumbs. Make sure to coat it well, pressing gently to help the crumbs adhere—this is what gives your katsu its signature crispy texture!
Step 4: Frying the cutlets
Heat oil in a large frying pan over medium-high heat until it reaches approximately 350°F (175°C). Carefully add your breaded cutlets to the pan, frying for about 3-4 minutes per side for chicken or 2-3 minutes for beef, until they turn golden brown and crispy. Remember, timing is crucial here—you want a perfectly cooked inside surrounded by that crunchy coating. Once done, transfer them to a paper towel-lined plate to drain excess oil.
Step 5: Preparing the tonkatsu sauce
While your cutlets are frying, consider whipping up a quick batch of tonkatsu sauce if you’re not using store-bought. In a small bowl, mix together:
- 3 tablespoons ketchup
- 2 tablespoons Worcestershire sauce
- 1 tablespoon soy sauce
- 1 teaspoon sugar
Adjust the sweetness to your liking, and voila! You have your own homemade tonkatsu sauce ready to drizzle.
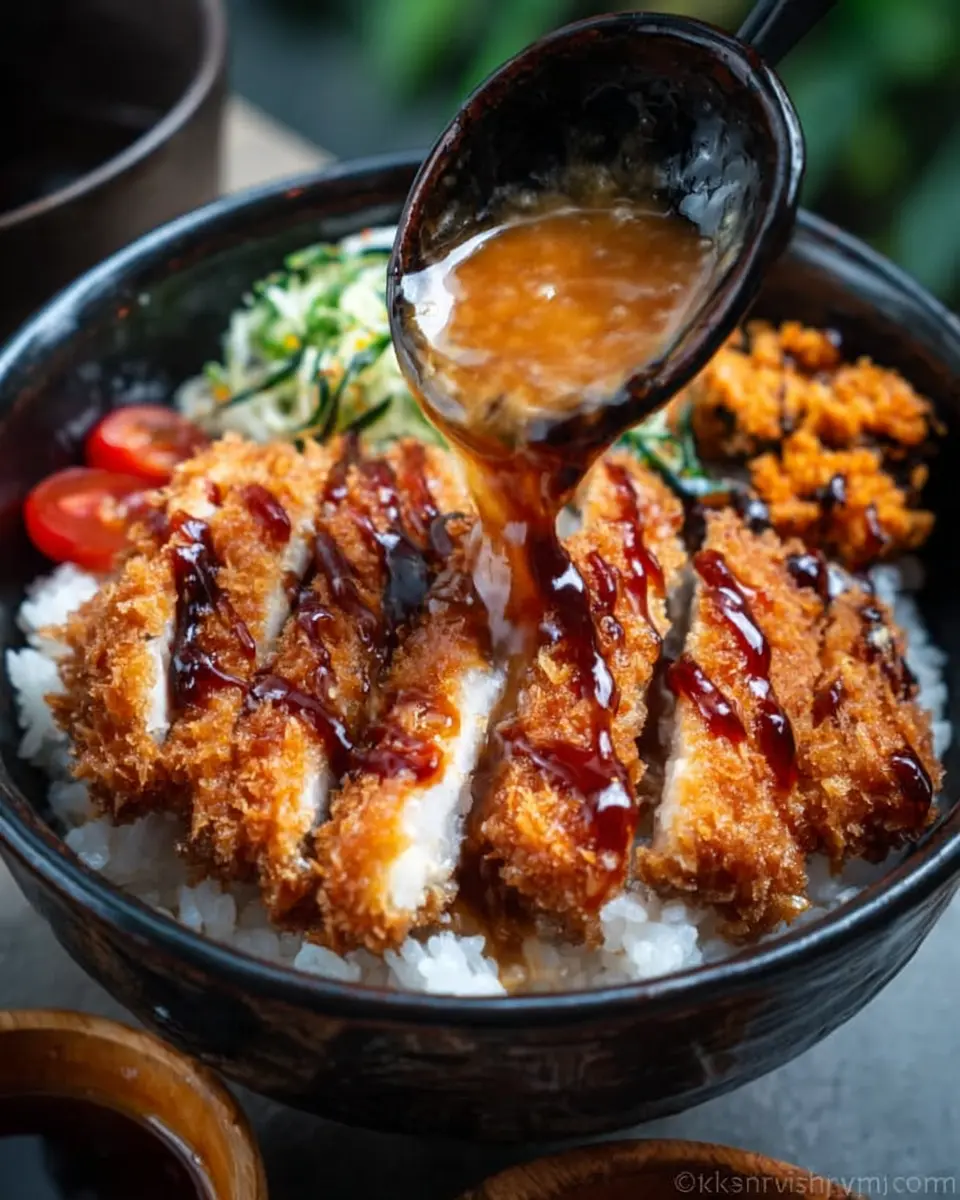
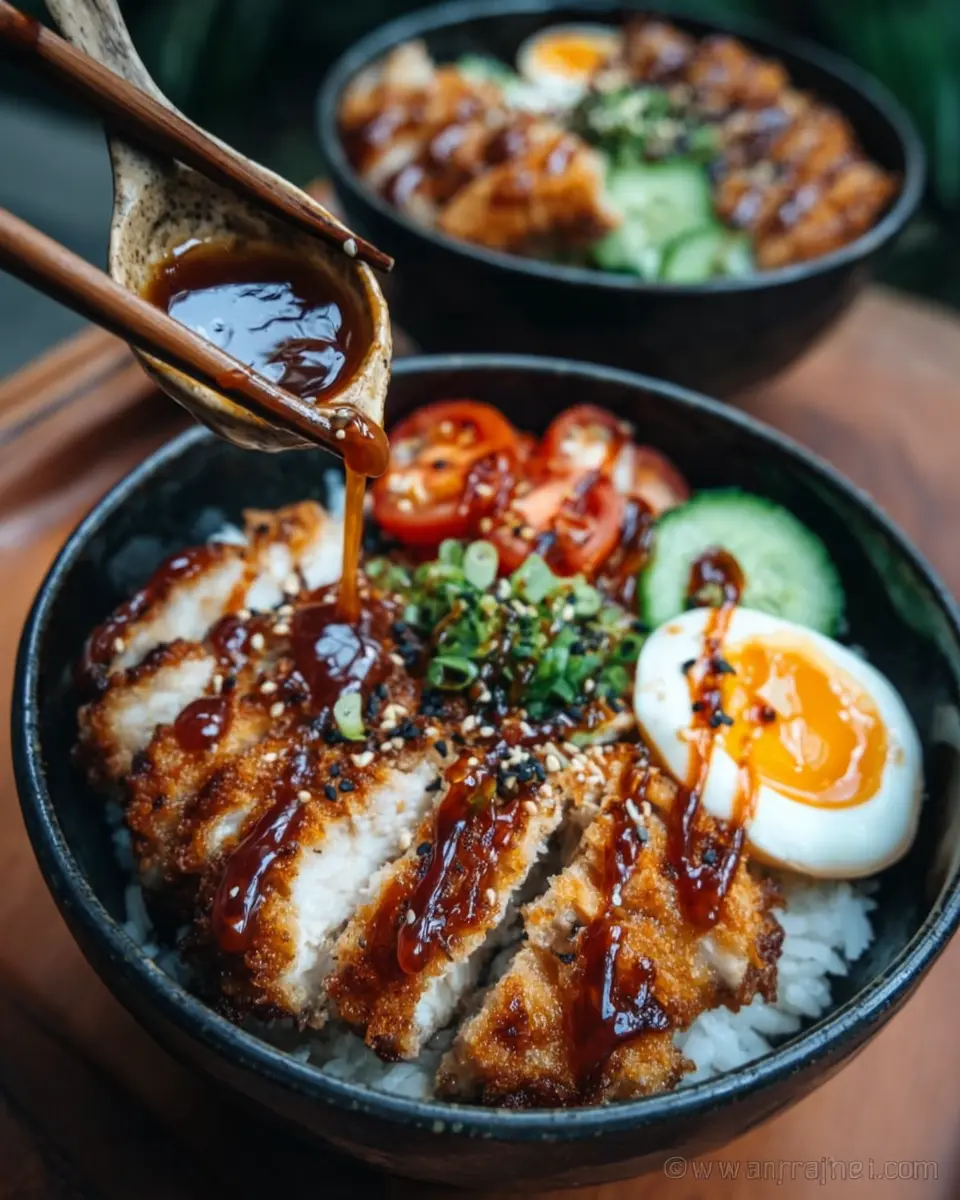
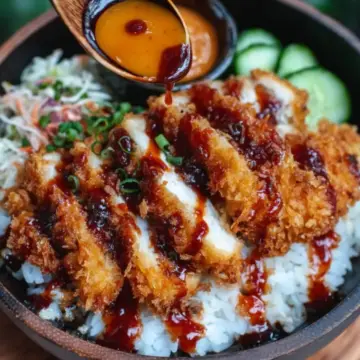
Step 6: Assembling the bowls
Now comes the fun part—assembling your Japanese Katsu Bowls! Start with a generous serving of cooked white rice, preferably sushi rice for that authentic touch. Slice the crispy cutlets and place them on top of the rice. Drizzle with your homemade or store-bought tonkatsu sauce, and if you’re feeling fancy, sprinkle some fresh parsley or sliced green onions for an extra pop of color and flavor.
Enjoy your delicious homemade Japanese Katsu Bowls! They are perfect for a cozy dinner or a casual lunch with friends. Who’s ready to dig in?

Variations of Japanese Katsu Bowls
Katsu Bowls with Vegetables
Looking to add some color to your meal? Japanese Katsu Bowls can be enriched with a variety of vegetables! Try pairing your crispy cutlets with sautéed seasonal veggies like bell peppers, zucchini, and broccoli. Tossing in some pickled ginger adds a delightful zing. It not only enhances the nutritional value but also creates a vibrant plate that’s as pleasing to the eye as it is to the palate.
Katsu Bowls with Curry
For a heartier option, why not turn your Katsu Bowl into a comforting currying delight? Simply serve your crispy cutlet over rice, smothered in a rich Japanese curry sauce. You can even incorporate diced potatoes and carrots in the curry for added texture and flavors. This twist transforms a simple dish into a warm, satisfying meal that’s perfect for any weeknight.
Want to dive deeper into the world of katsu? Explore traditional Japanese flavors and their modern adaptations on sites like Serious Eats and Japan Centre.
Cooking Tips and Notes for Japanese Katsu Bowls
Tips for Achieving the Perfect Crunch
For that signature crunchy texture in your Japanese Katsu Bowls, it’s essential to use panko breadcrumbs. These larger, airy crumbs not only create a delightful crunch but also let the flavor of the meat shine. Make sure to press the breadcrumbs firmly onto the cutlets before frying. A light dusting of flour before dipping in egg helps the panko adhere better.
For more insights on choosing the right breading methods, check out this guide on various breadcrumb types.
Notes on Oil Temperature and Frying Time
Getting the oil temperature just right is crucial. Heat your frying oil to about 350°F (175°C). If it’s too low, you risk soggy cutlets. Fry chicken for 3-4 minutes per side and pork for about 2-3 minutes, or until golden brown. Use a thermometer for accuracy, and avoid overcrowding the pan, as this drops the temperature and can lead to uneven cooking. Happy frying!
Serving Suggestions for Japanese Katsu Bowls
Ideal Sides to Accompany Katsu Bowls
When enjoying your Japanese Katsu Bowls, consider pairing them with refreshing sides that balance the richness of the crispy cutlets. A simple cucumber salad tossed in rice vinegar offers a tangy crunch, while steamed edamame delivers protein without overpowering the dish. Alternatively, a light miso soup warms the soul and complements the flavors beautifully.
Garnishing Ideas for a Vibrant Presentation
Elevate your presentation by adding vibrant garnishes. A sprinkle of chopped green onions or fresh parsley brings a splash of color and freshness. You might also try thinly sliced pickled vegetables for a delightful contrast and extra zest. For that authentic touch, place a lemon wedge on the side; its citrusy aroma enhances the overall experience.
Consider these tips to make your Japanese Katsu Bowls not just a meal, but an experience to remember!
Time Breakdown for Japanese Katsu Bowls
Preparation Time
Getting everything ready for your Japanese Katsu Bowls just takes about 15 minutes. This includes pounding the meat, seasoning, and setting up your breading station.
Cooking Time
Once you're prepped, the cooking process is quick—about 10-15 minutes. Frying the cutlets to a perfect golden brown and assembling your bowls is super satisfying.
Total Time
All in all, you’re looking at around 30 minutes from start to finish. Perfect for a weeknight dinner that feels special!
Nutritional Facts for Japanese Katsu Bowls
Calories
One serving of Japanese Katsu Bowls contains approximately 600-700 calories, depending on the portion size and the specific ingredients used.
Protein
These bowls pack a protein punch, with around 30-35 grams per serving. This makes them not only filling but also an excellent option for muscle recovery and energy.
Sodium
Keep in mind that sodium levels may vary, but a typical serving can have about 800-1000 mg. Opting for low-sodium soy sauce in your tonkatsu can help manage your intake!
For more insights on balancing your diet, check out resources like the USDA's FoodData Central for nutritional data.
FAQ about Japanese Katsu Bowls
Can I use a different type of meat?
Absolutely! While the classic Katsu bowls often feature chicken or beef, you can easily substitute with other proteins. Options like turkey or even plant-based alternatives work beautifully. Just ensure they're pounded to a similar thickness for even cooking.
What if I can’t find panko breadcrumbs?
If panko breadcrumbs seem elusive, don’t worry! You can make a quick substitute by using regular breadcrumbs or even crushing some crackers to achieve that crunchy texture. If you’re feeling adventurous, try making your own panko by toasting slices of bread and then breaking them into coarse pieces.
How to store leftover Katsu bowls?
Leftovers? You’re in luck! Store any uneaten Japanese Katsu bowls in airtight containers in the fridge for 2-3 days. For best quality, keep the cutlets separate from the rice until ready to enjoy again. When reheating, a quick fry in a pan can help to revive that crunchy texture. Happy cooking!
Conclusion on Japanese Katsu Bowls
Embracing homemade joy with Katsu bowls
Creating your own Japanese Katsu Bowls is more than just cooking; it's about savoring the experience. With the crispy cutlets and the irresistible tonkatsu sauce, each bowl brings warmth and satisfaction, perfect for any occasion. Dive in, share with friends, and enjoy this delightful culinary adventure!
Japanese Katsu Bowls with Tonkatsu Sauce
Equipment
- Large frying pan
Ingredients
Main Ingredients
- 2 pieces boneless chicken breasts or pork loin cutlets pounded to ½-inch thickness
- 1 cup panko breadcrumbs
- ½ cup all-purpose flour
- 2 large eggs beaten
- 3 cups cooked white rice (sushi rice preferred)
- ½ cup tonkatsu sauce (store-bought or homemade)
- oil for frying (vegetable or canola)
- fresh parsley or green onion (for garnish, optional)
Tonkatsu Sauce Ingredients
- 3 tablespoon ketchup
- 2 tablespoon Worcestershire sauce
- 1 tablespoon soy sauce
- 1 teaspoon sugar
Instructions
Cooking Instructions
- Pound chicken to ½-inch thickness and season with salt and pepper.
- Set up a breading station with three bowls: one for flour, one for beaten eggs, and one for panko breadcrumbs.
- Coat each cutlet in flour, then dip in egg, and finally coat with panko breadcrumbs, pressing gently to adhere.
- Heat oil in a large frying pan over medium-high heat to about 350°F (175°C).
- Fry the cutlets for 3-4 minutes per side (for chicken) or 2-3 minutes per side (for pork) until golden and cooked through. Transfer to a paper towel-lined plate.
- If making homemade tonkatsu sauce, mix ketchup, Worcestershire sauce, soy sauce, and sugar in a small bowl. Adjust sweetness to taste.
- Assemble bowls by adding cooked rice, sliced cutlets, and a generous drizzle of tonkatsu sauce. Garnish with parsley or green onions, if desired. Serve immediately.

Leave a Reply